

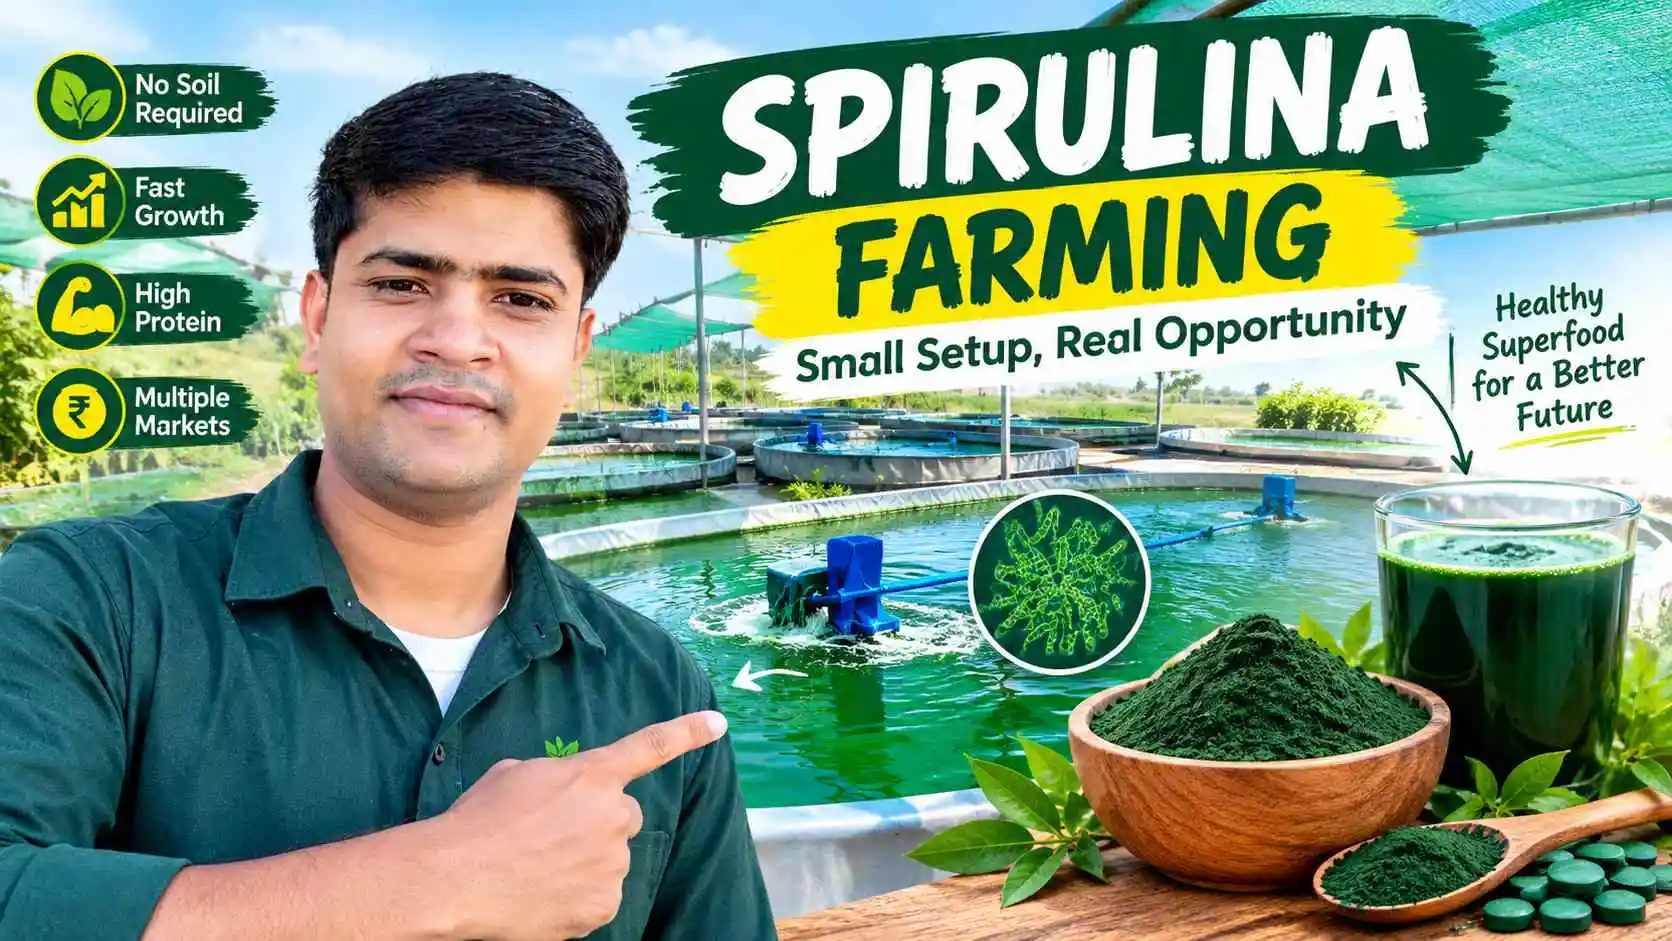

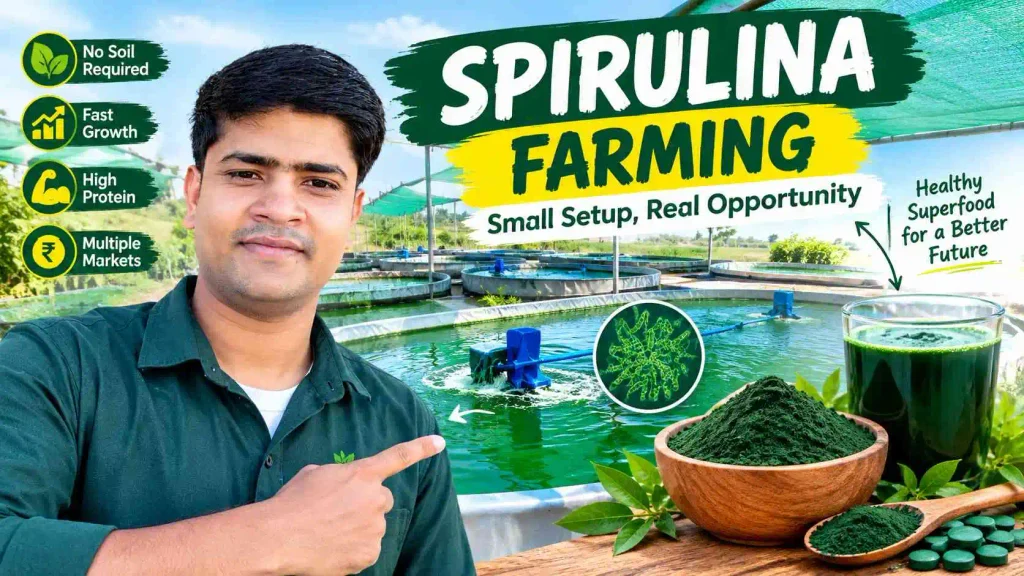
Spirulina Farming: Small Setup, Real Opportunity
A few years ago, “Spirulina farming” was mostly a conversation between researchers and health-food companies. Today it’s a conversation happening in farmer WhatsApp groups, at agricultural fairs, and between fathers and sons trying to figure out what to do with an unused rooftop or a half-acre plot that isn’t earning much from regular crops.
The pitch sounds almost too good: no soil required, fast growth, high protein content, and a product that sells for far more per kilogram than wheat, rice, or vegetables. That part is true. What most beginners don’t hear until they’ve already spent money is that Spirulina is a living culture, not a crop you plant and walk away from. Get the water chemistry wrong for even a few days, and you can lose the whole batch.
This article walks through what’s actually involved — choosing a system, setting up the farm, keeping the culture alive and productive, harvesting it properly, and figuring out whether the numbers work for your situation. By the end, you should have a realistic sense of whether Spirulina cultivation fits your land, your budget, and your patience for daily monitoring.
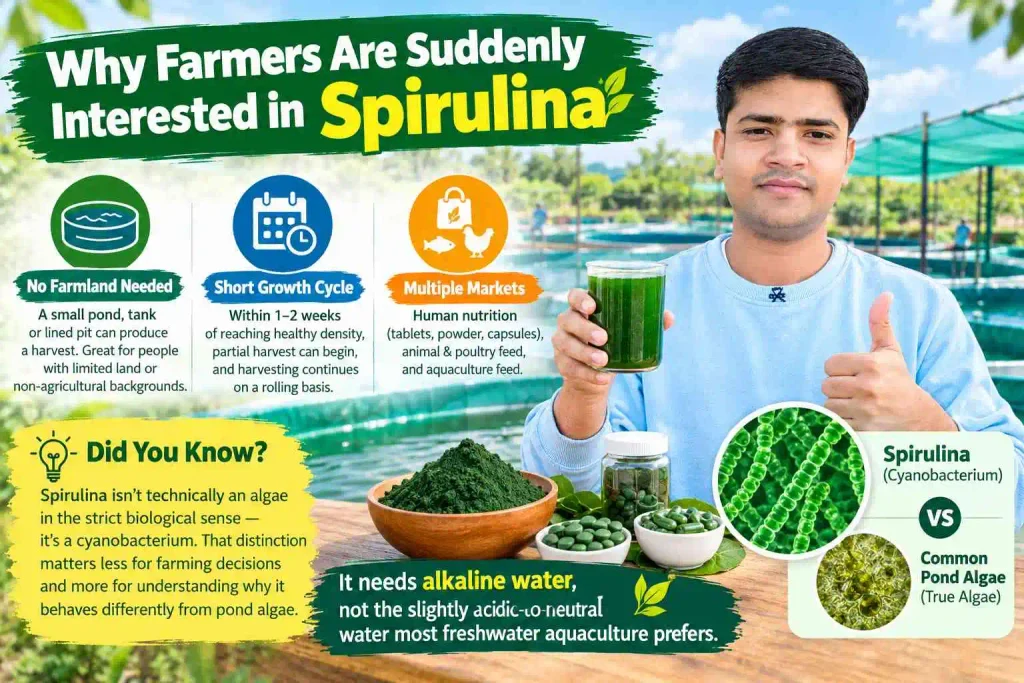
Why Farmers Are Suddenly Interested in Spirulina
Three things are driving the interest. First, Spirulina doesn’t need farmland in the traditional sense — a small pond, tank, or even lined pit can produce a harvest. That makes it attractive to people with limited land or non-agricultural backgrounds who still want to farm something.
Second, the growth cycle is short. Depending on conditions, a culture can be ready for partial harvest within a week or two of reaching a healthy density, and harvesting can then continue on a rolling basis rather than waiting for one seasonal cutoff.
Third, the end product has multiple markets — human nutrition (tablets, powder, capsules), animal and poultry feed, and aquaculture feed. That gives a producer more than one way to sell if one channel is slow.
None of this means Spirulina farming is easy money. It means the entry barrier is different from conventional farming — lower land requirement, but higher demand for daily attention and biological know-how.
Did You Know? Spirulina isn’t technically an algae in the strict biological sense — it’s a cyanobacterium. That distinction matters less for farming decisions and more for understanding why it behaves differently from pond algae you might already be familiar with: it needs alkaline water, not the slightly acidic-to-neutral water most freshwater aquaculture prefers.
Is Spirulina Farming Actually Profitable?
The honest answer is: it can be, but not automatically, and not immediately. Profitability depends on production consistency, product quality, and — this is the part beginners underestimate — having a buyer lined up before the first harvest, not after.
Spirulina sells in different forms at very different price points. Wet biomass sells for little. Dried powder sells for considerably more. Tableted or encapsulated Spirulina, sold as a nutritional supplement, commands the highest price — but also requires food-safety compliance, testing, and often a brand relationship with a buyer or your own packaging line.
A farmer who treats Spirulina as “grow it and see who buys it” usually struggles. A farmer who lines up a buyer — a supplement company, a feed mill, a local health food distributor — before scaling up tends to do considerably better, because production planning becomes demand-driven rather than a guessing game.
Common Mistake: Many first-time growers invest in a large production tank before confirming they have anywhere to sell more than a few kilograms a month. Production capacity without a buyer is just an expensive hobby.
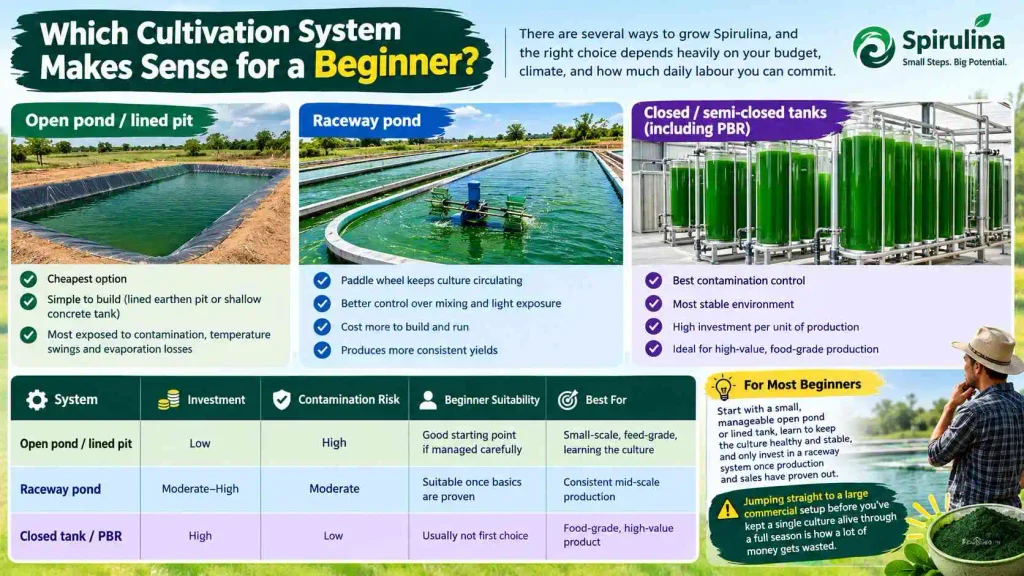
Which Cultivation System Makes Sense for a Beginner?
There are several ways to grow Spirulina, and the right choice depends heavily on your budget, climate, and how much daily labour you can commit.
Open ponds are the cheapest option and the most common for small and mid-sized producers, especially in warm climates. They’re simple to build — often just a lined earthen pit or a shallow concrete tank — but they’re also the most exposed to contamination, temperature swings, and evaporation losses.
Raceway ponds, which use a paddle wheel to keep the culture circulating, give better control over mixing and light exposure, and are the standard for most commercial-scale operations. They cost more to build and run but produce more consistent yields.
Closed or semi-closed tanks (including photobioreactors on the high end) offer the best contamination control and the most stable environment, but the investment per unit of production is much higher. These make sense for high-value, food-grade production where quality consistency matters more than volume.
Not every Spirulina farm needs the same setup. A beginner testing the market has very different priorities from someone building a commercial supply operation. The comparison below shows where each system tends to make sense.
| System | Investment | Contamination Risk | Beginner Suitability | Best For |
|---|---|---|---|---|
| Open pond / lined pit | Low | High | Good starting point if managed carefully | Small-scale, feed-grade, learning the culture |
| Raceway pond | Moderate–High | Moderate | Suitable once basics are proven | Consistent mid-scale production |
| Closed tank / PBR | High | Low | Usually not first choice | Food-grade, high-value product |
For most beginners, the safest approach is to start with a small, manageable open pond or lined tank, learn to keep the culture healthy and stable, and only invest in a raceway system once production and sales have proven out. Jumping straight to a large commercial-style setup before you’ve kept a single culture alive through a full season is how a lot of money gets wasted.
How Much Space Do You Actually Need to Start?
This is one of the more reassuring parts of Spirulina farming — you don’t need acres. A test unit can be run in a space as small as 20–50 square metres, including room for filtration, drying, and basic storage. What you need more than land is reliable access to clean water, consistent sunlight (or supplemental lighting), and a location where temperature doesn’t swing too wildly between day and night.
Farmers in regions with strong, consistent sun and warm year-round temperatures have a natural advantage, since Spirulina growth slows noticeably in cool weather. In cooler climates, growth is still possible but usually requires some form of temperature management, which adds cost.
Why Water Quality Can Make or Break Your Spirulina Culture
Here’s something that surprises a lot of new growers: Spirulina doesn’t grow in ordinary pond or borewell water straight out of the tap. It needs alkaline water with a specific mineral profile, and that water has to be prepared as a culture medium before the culture is introduced.
Water quality affects three things simultaneously — growth rate, contamination resistance, and final product safety. Water contaminated with heavy metals, pesticide residue, or pathogenic organisms doesn’t just slow growth; it can end up concentrated in the harvested product, which is a serious food-safety concern if you’re selling for human consumption.
What farmers should actually do:
- Test source water before setting up the farm, not after problems appear.
- Use filtered or treated water as your base, particularly for food-grade production.
- Re-test periodically, especially if water source or season changes.
- Keep a simple daily log of pH and appearance — cheap insurance against a ruined batch.
Expert Tip: If you’re planning to sell for human consumption eventually, source and test your water as if you’re already food-grade from day one. Retrofitting water quality standards after you’ve built a customer base is far harder than starting with the right water source.
Getting the Environment Right: pH, Temperature, and Sunlight
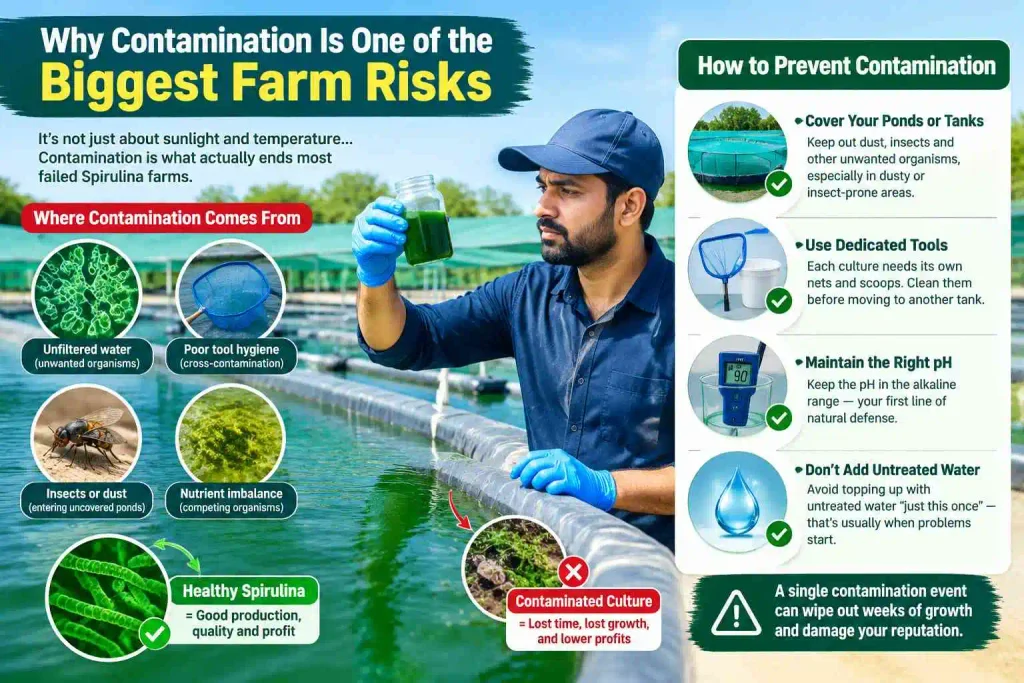
Spirulina cultures are typically maintained at a high pH — generally in the alkaline range — because this actually works in the farmer’s favor: it suppresses many competing organisms and pests that can’t tolerate that environment. This is one reason well-managed Spirulina cultures can be more forgiving of light contamination than people expect, provided the pH is kept in the right operating range.
Temperature has a narrower comfort zone. Growth is generally strongest in warm conditions and slows considerably as temperatures drop. Very high midday temperatures in peak summer, especially in shallow open ponds, can also stress the culture if there’s no shading or depth to buffer the heat.
Sunlight is necessary, but more isn’t always better. Excessive direct light combined with high culture density can actually cause self-shading problems or photoinhibition at the surface. Cloudy weather isn’t catastrophic — growth slows, but a stable culture usually recovers once sunlight returns, provided other conditions were being maintained properly.
Practical monitoring routine most farmers settle into:
- Check pH once or twice daily, especially during early setup.
- Track culture colour and consistency by eye — a trained eye catches problems before instruments do.
- Monitor temperature during extreme weather (very hot or unusually cold spells).
- Keep partial shading options available (netting, position of tanks) rather than fixed exposure.
The important point: these are operating ranges, not fixed numbers that apply universally. Your strain, your climate, your system design, and your production goal (food-grade vs feed-grade) all shift what “correct” looks like for your farm. Treat published figures as a starting reference, and adjust based on what your own culture tells you over time.
What Does Healthy Spirulina Culture Actually Look Like?
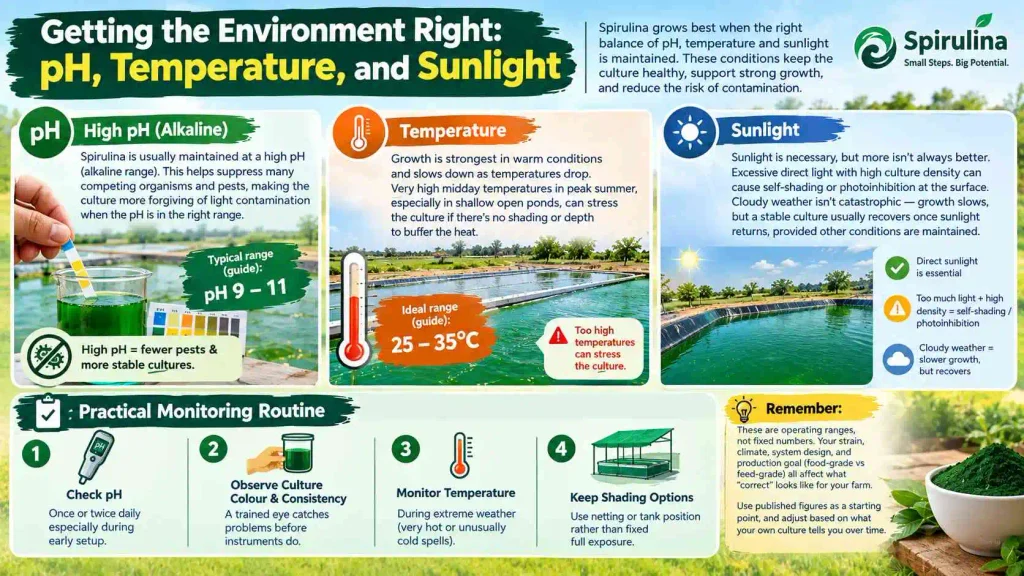
A healthy culture has a distinct blue-green to deep green colour, moves visibly when stirred (the filaments have a slightly stringy, textured appearance rather than looking like flat green water), and has a mild, not unpleasant, smell.
Warning signs that something is going wrong include:
- Colour shifting toward yellow, pale green, or brown
- A strong, foul, or unusually sharp odour
- Growth stalling or reversing over several days despite stable conditions
- Visible unwanted organisms — other algae, insect larvae, or unusual film on the surface
- Clumping or settling that wasn’t there before
Warning: Don’t harvest or sell material from a culture showing these signs, even if part of the batch still looks fine. Contamination isn’t always visible throughout the whole tank, and cross-contamination between batches is a real risk. When in doubt, isolate the affected culture, investigate the cause (usually water quality, pH drift, or poor hygiene), and only return to normal harvesting once you’re confident the issue is resolved.
Why Contamination Is One of the Biggest Farm Risks
If there’s one section of this article worth re-reading, it’s this one. New growers spend a lot of energy worrying about sunlight and temperature, and comparatively little worrying about contamination — but contamination is what actually ends most failed Spirulina farms.
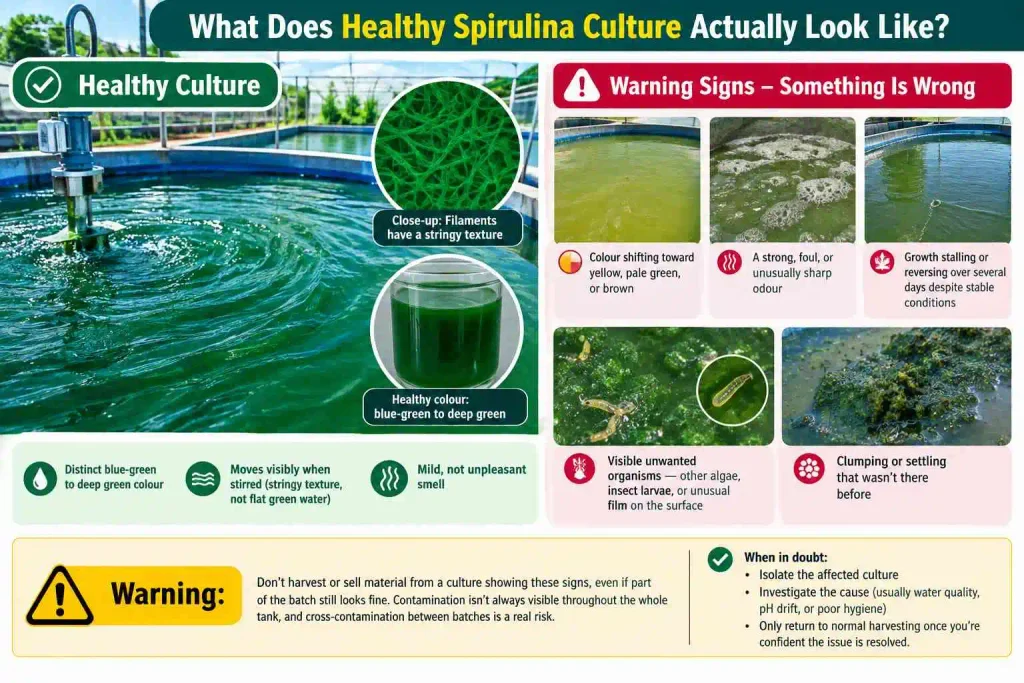
Contamination can come from several directions: unfiltered water introducing unwanted organisms, poor tool hygiene during harvesting, insects or dust entering an uncovered pond, or nutrient imbalance creating conditions where competing organisms outcompete the Spirulina itself.
The fix isn’t complicated, but it does require consistency:
- Cover ponds or tanks where practical, especially in dusty or insect-prone areas.
- Use dedicated tools for each culture — don’t move nets or scoops between tanks without cleaning.
- Maintain pH in the correct alkaline range, since this is your first line of natural defense.
- Don’t top up with untreated water “just this once” — that’s usually when problems start.
This matters because it affects production, quality, and profit all at once. A single contamination event can wipe out weeks of growth and, if unnoticed, damage your reputation with a buyer who receives a bad batch.
Daily Farm Management: What This Actually Looks Like Day to Day
People sometimes picture Spirulina farming as passive — a tank sitting in the sun. In reality, it needs daily attention, even at small scale. A typical day involves checking pH and appearance, stirring or circulating the culture (critical in still ponds to prevent settling and uneven light exposure), topping up water lost to evaporation, and checking for early signs of contamination.
This is worth being upfront about before you invest: if nobody is available to check the culture daily — including weekends — you’re taking on real risk. Spirulina doesn’t pause its biology because you’re busy with something else that day.
When Should You Harvest Spirulina for Better Production?
Harvesting isn’t just “whenever it looks green enough.” Culture density needs to reach a workable level — dense enough to make harvesting efficient, but not so dense that the culture starts self-shading and stressing at the bottom of the tank.
Most producers harvest a portion of the culture regularly (rather than draining the whole tank at once), which keeps the remaining culture at a healthy density to keep growing continuously. This rolling-harvest approach is generally more productive over time than waiting for one large batch.
What actually happens during harvest:
- Filtration — the culture is passed through fine mesh or cloth filters to separate the Spirulina biomass from the liquid medium.
- Washing — the collected biomass is rinsed to remove residual medium, salts, and any surface contaminants.
- Dewatering — excess water is pressed or drained out before drying, since wet biomass dries far too slowly and unevenly on its own.
Skipping or rushing any of these steps shows up later as poor colour, poor shelf life, or an off smell in the dried product — even if the culture itself was perfectly healthy.
Drying Spirulina Is Easy — Until Product Quality Starts Slipping
Drying looks like the simple part, and that’s exactly why it goes wrong so often. Spirulina is sensitive to heat and light during drying — too much of either and you degrade colour, nutritional value, and shelf stability, even though the material still looks “dry enough” to the eye.
Common drying approaches and their trade-offs:
| Method | Cost | Quality Outcome | Practical Notes |
|---|---|---|---|
| Open sun drying | Low | Variable, risk of contamination and degradation | Needs covering/netting; weather-dependent |
| Shade drying | Low–Moderate | Better colour retention | Slower, needs good airflow |
| Mechanical/tray drying | Moderate–High | Most consistent | Better for food-grade, more control |
Practical Tip: If you’re drying for human-consumption markets, avoid open uncovered sun drying wherever possible. Dust, insects, and UV degradation are hard to control, and buyers in the food-grade segment will notice inconsistent colour or odour quickly.
Moisture control matters just as much as the drying method. Under-dried Spirulina spoils in storage; over-dried Spirulina can lose quality and become brittle and hard to process into powder cleanly. A simple moisture check before packaging is a habit worth building early.
Storage, Packaging, and the Food-Grade vs Feed-Grade Question
Not all Spirulina is headed for the same shelf. Feed-grade product (for poultry, livestock, or aquaculture) has more flexible handling and packaging requirements. Food-grade product intended for human consumption — powders, tablets, capsules — requires stricter hygiene throughout processing, appropriate packaging that protects against moisture and light, and, depending on your location, food-safety registration or certification before it can be sold commercially.
Deciding early which market you’re producing for changes almost everything downstream — your drying method, your packaging investment, your testing requirements, and your realistic price point. Trying to serve both markets from the same process without adjusting standards for the food-grade side is a common way quality complaints start.
Where Does the Money Actually Go in a Spirulina Farm?
It’s tempting to calculate profitability using only the selling price of dried Spirulina, but that ignores where the money actually goes before a sale happens. A realistic cost breakdown typically includes:
- Capital costs: pond/tank construction, filtration equipment, drying setup, basic testing tools
- Recurring costs: nutrient/culture medium inputs, water, electricity (especially for circulation or mechanical drying), labour
- Post-harvest costs: filtration materials, packaging, transportation, and — for food-grade — testing and certification
- Market costs: time and effort spent building buyer relationships, which is easy to underestimate
A simplified illustrative example (figures are for demonstrating the calculation method only, not a promise of returns):
Suppose a small unit produces 2 kg of dried Spirulina per week. If recurring weekly costs (nutrients, water, electricity, labour) run to a certain amount, and the product sells at a given feed-grade or food-grade price, profit is simply revenue minus those recurring costs — before capital investment is even recovered. The real number depends entirely on your local input costs, your actual yield (which varies with season and management quality), and the price your specific buyer pays for your specific product form.
This is why broad claims like “Spirulina farming earns ₹X per month” are close to meaningless without knowing the scale, product form, and buyer arrangement behind the number. Build your own version of this calculation using your actual local costs before committing capital.
Common Beginner Mistakes Worth Avoiding
- Building production capacity before securing a buyer
- Underestimating daily labour and monitoring requirements
- Using untested or untreated water as the culture medium
- Rushing the drying process, especially under direct open sun
- Treating a mild contamination sign as “probably fine” instead of investigating it
- Scaling up before proving consistent quality at small scale

Scaling From a Small Unit to a Commercial Operation
Once a small unit has run through at least a full season — ideally through both favourable and difficult weather — and you have a buyer taking product consistently, scaling becomes a much more informed decision. At that point you’re expanding a system you understand, rather than guessing at a larger scale from day one.
Expansion usually means moving from a simple pond to a raceway system for better consistency, adding proper mechanical drying to handle higher volume without quality loss, and, if targeting food-grade markets, formalizing food-safety compliance and testing as part of routine operations rather than an afterthought.
The Real Starting Point for Anyone Considering This
Spirulina farming rewards patience and daily discipline more than it rewards a big initial investment. The farmers who do well with it are usually the ones who started small, learned to read their culture’s health by eye, built a reliable process for harvesting and drying without cutting corners, and lined up buyers before chasing bigger production numbers.
That’s really the core discipline in any biological production venture — Spirulina especially. A small tank you can monitor, dose, and harvest daily teaches you the rhythm of pH swings, temperature stress, and contamination risk in a way that no amount of research or bigger-is-better ambition can substitute for. Once you’ve run a full season without a crash, and once you have a buyer who keeps coming back for your product, you’ve actually validated the business — not just the biology.
This same “prove it small before you scale” logic shows up in other agri-ventures too. If you’re weighing hydroponic fodder as a parallel or alternative venture, it’s worth looking at what a realistic starter setup costs and what the first week of growing actually looks like day by day — this guide breaks it down clearly: Hydroponic Fodder: Cost, Setup & 7-Day Growing Guide.
Same principle either way — get the daily management down cold on a small scale before you sink capital into something bigger.
Newsletter