



Chick Brooding Guide: Temperature, Feed & Water Management
A box of day-old chicks can look perfect. Fluffy, alert, cheeping loudly, standing on strong little legs. And yet, two weeks later, that same batch can be uneven, sluggish, and already behind on weight — not because the chicks were weak to begin with, but because something in the brooder wasn’t right.
That’s the uncomfortable truth about chick brooding: the damage is often invisible at first. A chick that gets chilled on day two doesn’t necessarily die. It just stops growing the way it should. A chick that can’t reach the feeder easily doesn’t starve outright — it simply falls behind the rest of the flock, and it never quite catches up.
So why do chicks huddle together right under the heat lamp on some mornings, and scatter to the far corners of the room on others? Why do some chicks pace restlessly along the brooder guard instead of settling down? And why can a thermometer read exactly the “correct” temperature while the chicks themselves are clearly unhappy?
These are the kinds of questions that separate a farmer who’s guessing from one who’s actually managing the brood. This guide walks through everything that matters during those first critical weeks: brooding temperature and how it should change over time, brooder setup and preheating, litter and floor preparation, chick placement, feed and water management, lighting, ventilation, stocking density, how to read cold stress and heat stress in chick behavior, the mistakes that quietly cost farmers money, and a practical day-by-day approach to getting through the first week.
If there’s one idea to hold onto before diving in, it’s this: get brooding wrong, and you can lose money before the chicks have even had a real chance to grow.

What Makes the First Few Weeks So Important?
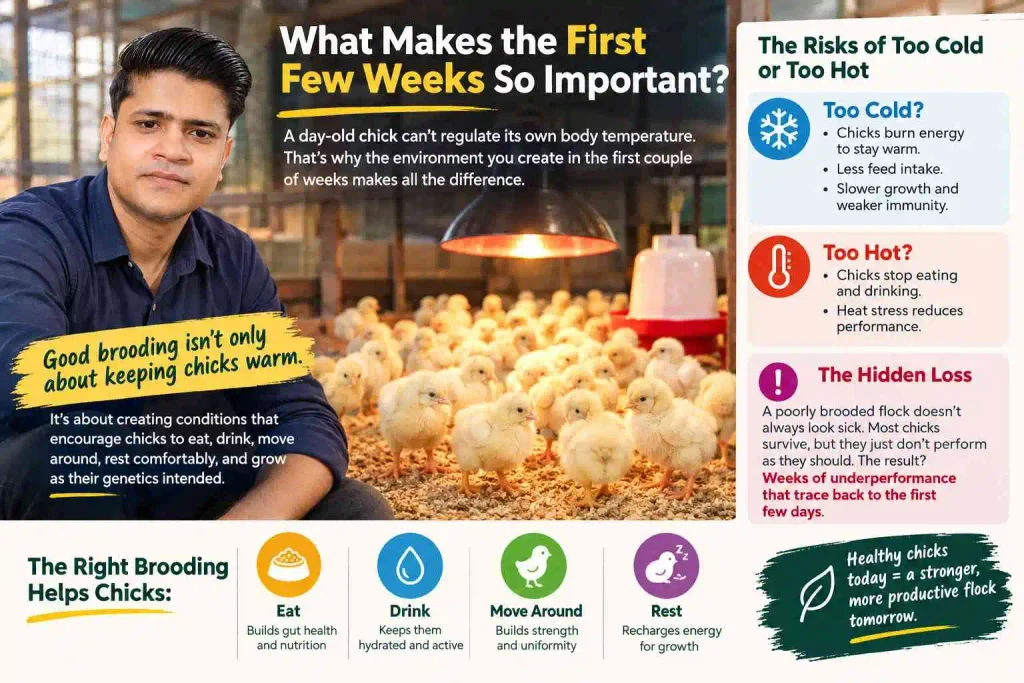
A day-old chick can’t do something most farmers take for granted — regulate its own body temperature. That ability develops gradually over the first couple of weeks of life, which means that during this window, the chick depends almost entirely on the environment you create for it. There’s no internal backup system. If the brooder is too cold, the chick burns energy trying to stay warm instead of using that energy to grow. If it’s too hot, the chick stops eating and drinking to cope with the heat stress.
This isn’t just a comfort issue — it cascades into everything else. A chilled or overheated chick eats less in its first days, and early feed intake is closely tied to gut development, immune function, and how uniformly the flock grows later on. A flock that starts unevenly tends to stay uneven. Some birds pull ahead, others fall behind, and by the time you’re marketing or laying birds, that early gap in performance is still visible in the paperwork — feed conversion, mortality, and body weight uniformity.
Here’s what makes this tricky for new farmers: a poorly brooded flock doesn’t always look sick. Most of the chicks survive. They just don’t perform the way they should have. That’s a quiet kind of loss — no dramatic mortality event to point to, just weeks of underperformance that trace back to conditions during the first several days.
Good brooding isn’t only about keeping chicks warm. It’s about creating conditions that encourage chicks to eat, drink, move around, rest comfortably, and grow the way their genetics intended. Everything from here forward is really an extension of that one idea.
How to Prepare the Brooder Before the Chicks Arrive
The single biggest mistake new farmers make isn’t a wrong temperature setting — it’s timing. Too many brooders get switched on right as the chick delivery truck pulls up, or worse, after the chicks are already inside the house. By then, the chicks have already spent their first hour or two in a cold environment, and that head start is hard to recover from.
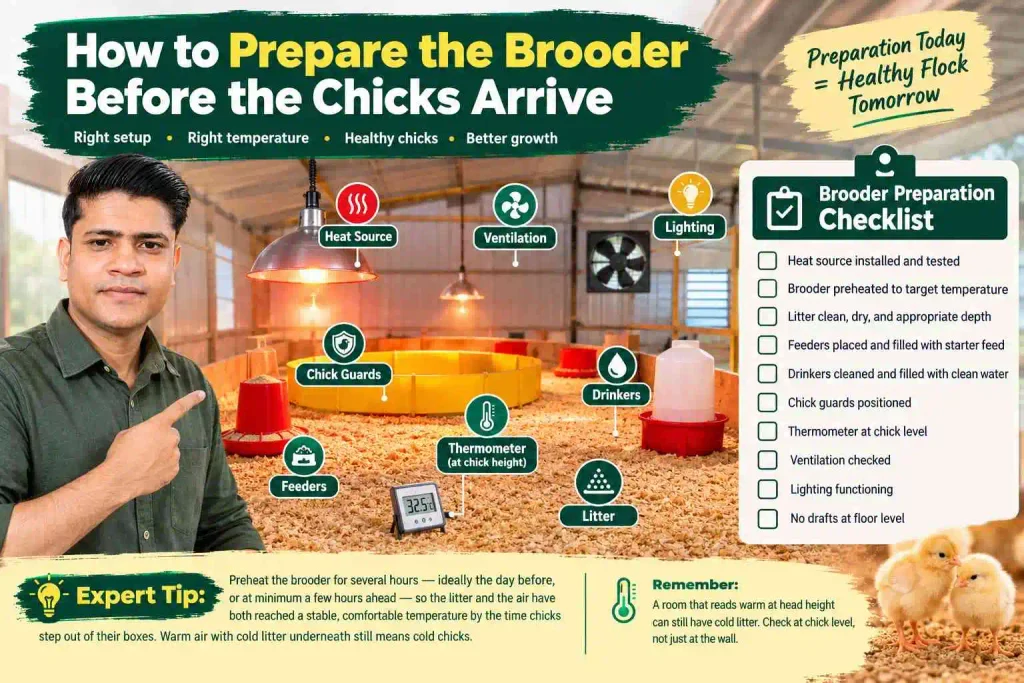
Before chicks ever arrive, the following should already be in place and functioning:
- Heat source (brooder lamps, radiant heaters, or gas brooders) installed and tested
- Fresh, dry litter spread to an appropriate depth
- Feeders positioned and filled with starter feed
- Drinkers cleaned, filled, and checked for leaks
- Chick guards set up to keep chicks close to heat and feed in the first days
- A reliable thermometer placed at chick height, not at ceiling or wall height
- Ventilation system checked and adjusted
- Lighting installed and working correctly
Expert Tip: Preheat the brooder for several hours — ideally the day before, or at minimum a few hours ahead — so the litter and the air have both reached a stable, comfortable temperature by the time chicks step out of their boxes. Warm air with cold litter underneath still means cold chicks.
Preheating matters because chicks are in direct contact with the floor almost constantly during the first days. A room that reads warm at head height can still have litter that’s uncomfortably cold, especially over concrete floors or in houses with poor insulation. That mismatch is easy to miss if you only check a wall-mounted thermometer.
While you’re preparing, walk the brooder area the way a chick would experience it — down low. Check for drafts near doors or vents. Check that litter isn’t damp or caked anywhere. Check that no equipment blocks a clear path between the heat source, feeders, and drinkers. A quick checklist before placement day can save you from correcting avoidable problems after the chicks are already stressed.
| Brooder Preparation Checklist | Ready? |
|---|---|
| Heat source installed and tested | ☐ |
| Brooder preheated to target temperature | ☐ |
| Litter clean, dry, and appropriate depth | ☐ |
| Feeders placed and filled with starter feed | ☐ |
| Drinkers cleaned and filled with clean water | ☐ |
| Chick guards positioned | ☐ |
| Thermometer at chick level | ☐ |
| Ventilation checked | ☐ |
| Lighting functioning | ☐ |
| No drafts at floor level | ☐ |
What Brooding Temperature Do Chicks Actually Need?
It’s tempting to look for a single number and treat it as gospel — “keep it at X degrees and you’re done.” In practice, brooding temperature isn’t a fixed target; it’s a moving one that changes as the chicks grow and feather out, and it also depends on breed, housing type, ventilation, climate, and the specific equipment you’re using.
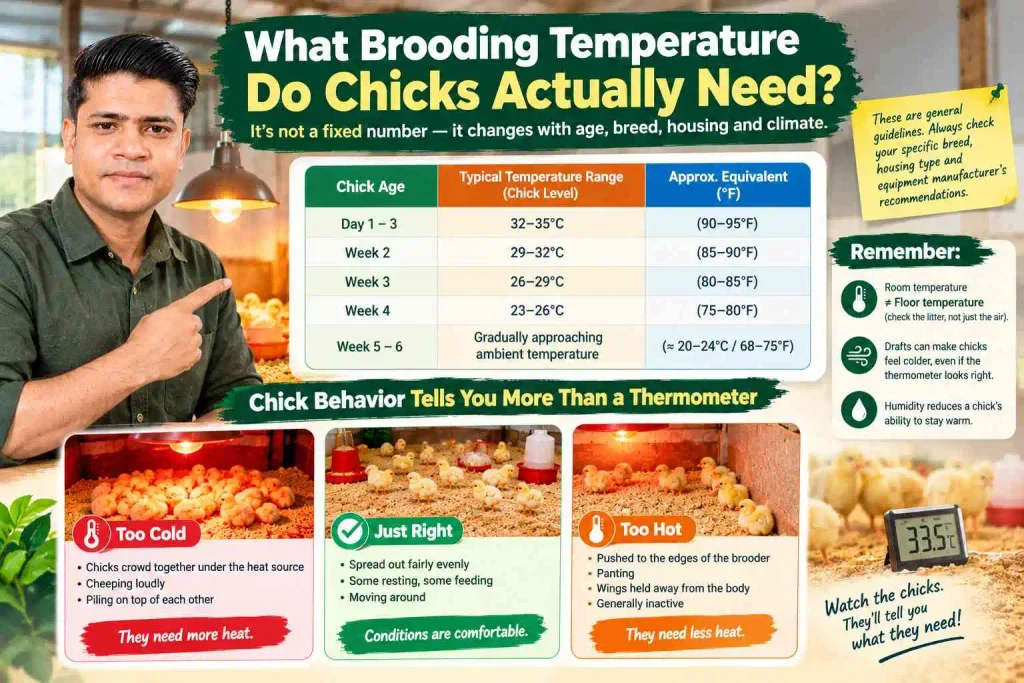
As a general starting point, many commercial guidelines recommend beginning brooding somewhere around 32–35°C (90–95°F) at chick level during the first few days, then gradually reducing the temperature by roughly 2–3°C (about 3–5°F) per week as chicks feather out and become better able to regulate their own body heat, until reaching ambient temperature by around four to six weeks of age. These figures are commonly cited ranges, not universal rules — always cross-check them against the recommendations for your specific breed or hybrid, and adjust based on how your chicks are actually behaving.
| Approximate Chick Age | Typical Starting Temperature Range (Chick Level) |
|---|---|
| Day 1–3 | ~32–35°C (90–95°F) |
| Week 2 | ~29–32°C (85–90°F) |
| Week 3 | ~26–29°C (80–85°F) |
| Week 4 | ~23–26°C (75–80°F) |
| Week 5–6 | Gradually approaching ambient/house temperature |
A few things complicate this table, and they matter more than the numbers themselves. Floor temperature and room temperature are not the same thing — a room can read 33°C on a wall thermometer while the litter surface, where chicks are actually standing, is several degrees cooler. Drafts change how chicks perceive warmth even when the air temperature hasn’t moved; a slight breeze at floor level can make chicks feel colder than the thermometer suggests. Humidity plays a role too — damp air conducts heat away from a chick’s body faster than dry air, so a humid brooder can feel colder to chicks than the same temperature in dry conditions.
This is exactly why an experienced farmer never relies on the thermometer alone.
If chicks are crowding tightly directly under the heat source, cheeping loudly, and piling on top of each other, they’re almost certainly too cold.
If chicks are pushed out to the edges of the brooder, panting, with wings held away from their bodies and generally inactive, they’re too hot.
If chicks are spread out fairly evenly across the brooding area — some resting, some feeding, some moving around — that’s usually a good sign that conditions are comfortable.
Chick behavior is telling you something the thermometer can’t. Learn to read it, and you’ll catch problems the numbers alone would miss.
How to Tell if Chicks Are Too Cold or Too Hot
Here’s a scenario every new farmer eventually runs into: the thermometer says the temperature is correct, but something about the chicks still looks off. What then?
This is where distribution patterns become your most useful diagnostic tool. Chicks can’t tell you verbally that they’re uncomfortable, but where they choose to stand tells you almost everything.
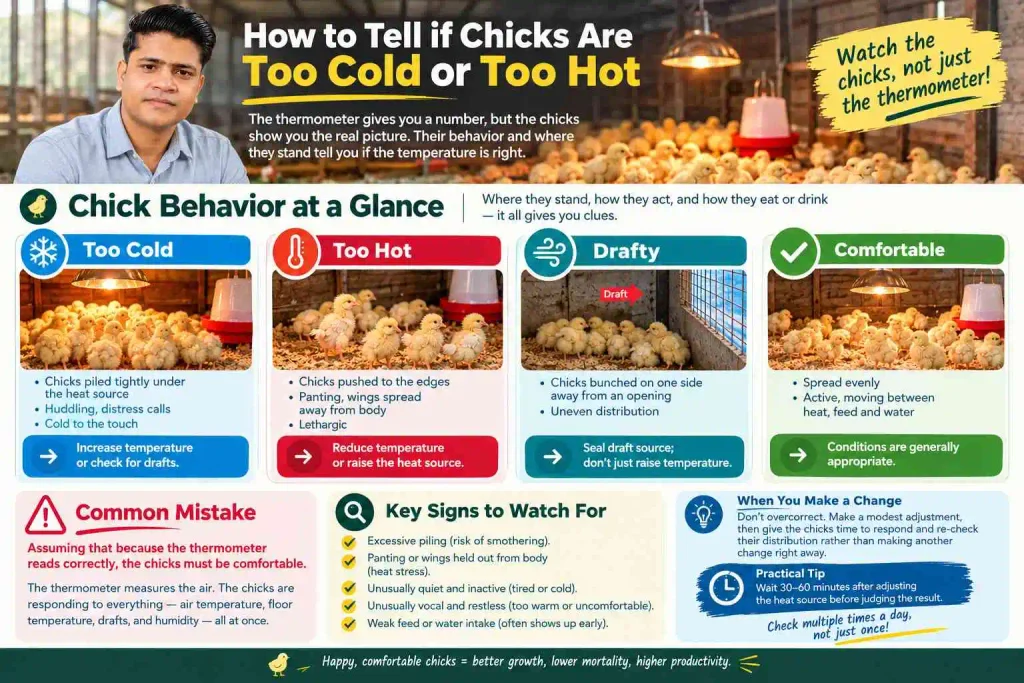
| Condition | What You’ll See | What It Means |
|---|---|---|
| Too cold | Chicks piled tightly under the heat source, huddling, distress calls, cold to the touch | Increase temperature or check for drafts |
| Too hot | Chicks pushed to the edges, panting, wings spread away from body, lethargic | Reduce temperature or raise the heat source |
| Drafty | Chicks bunched on one side away from an opening, uneven distribution | Seal draft source; don’t just raise temperature |
| Comfortable | Chicks spread evenly, active, moving between heat, feed, and water | Conditions are generally appropriate |
Beyond distribution, watch for a few specific signals: excessive piling (a sign chicks are actively trying to conserve warmth and, worrying, a smothering risk for chicks at the bottom of the pile); panting or holding wings out from the body (classic heat stress signs); chicks that seem unusually quiet and inactive versus chicks that are unusually vocal and restless; and weak feed or water intake, which often shows up before any other visible symptom.
Common Mistake: Assuming that because the thermometer reads correctly, the chicks must be comfortable. The thermometer measures the air. The chicks are responding to everything — air temperature, floor temperature, drafts, and humidity — all at once.
When you spot a problem, don’t overcorrect. Make a modest adjustment, then give the chicks time to respond and re-check their distribution rather than making another change right away.
Practical Tip: After adjusting the heat source, wait roughly 30–60 minutes before judging the result. Chicks need a little time to redistribute themselves once conditions change.
Treat this kind of observation as something you do multiple times a day, not something you check once and forget. Chick behavior is a daily — really an hourly, during the first days — management tool.
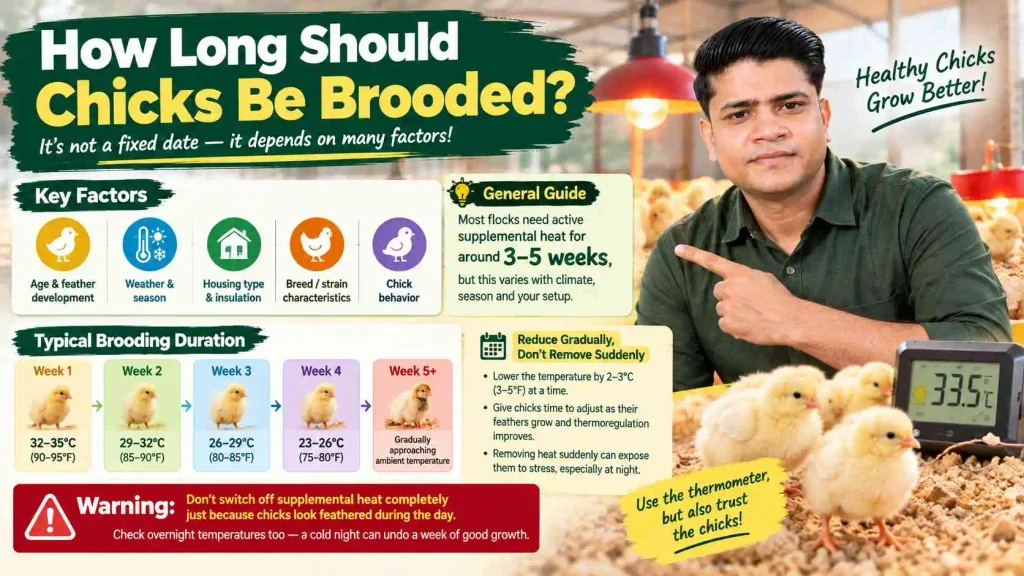
How Long Should Chicks Be Brooded?
There isn’t a single day on the calendar where every flock in every climate can safely have its heat source switched off. Brooding duration depends on a combination of factors: the age and feather development of the chicks, current and forecast weather, the type of housing, breed or strain characteristics, and — again — how the chicks themselves are behaving.
As a general guide, many flocks need active supplemental heat for somewhere around three to five weeks, though this varies widely depending on climate and season. Chicks brooded during cold winter months, or in poorly insulated housing, typically need heat longer than chicks brooded in mild weather or well-insulated facilities.
It also helps to separate two different ideas that get lumped together: reducing heat and removing heat entirely. Reducing heat gradually — a degree or two at a time, spaced out over days — gives chicks the chance to adjust as their feathers come in and their thermoregulation improves. Removing heat suddenly, especially if done because a calendar date was reached rather than because the chicks were actually ready, can expose young chicks to conditions they aren’t equipped to handle yet, particularly overnight when temperatures typically drop.
Warning: Don’t switch off supplemental heat completely just because chicks look feathered during the day. Check overnight temperatures too — a cold night can undo a week of good growth if chicks are left without adequate warmth.
The safest approach is to treat brooding duration as a gradual wind-down guided by observation, not a fixed deadline.
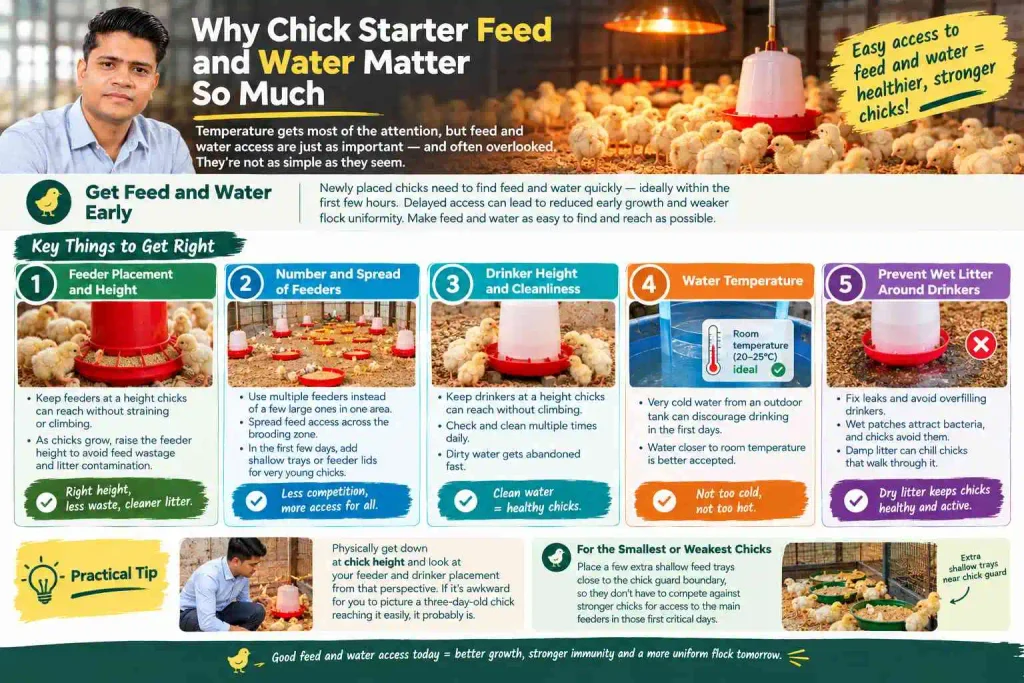
Why Chick Starter Feed and Water Matter So Much
Temperature gets most of the attention in brooding conversations, but feed and water access deserve just as much scrutiny — and they’re often overlooked simply because they seem straightforward. They aren’t.
Newly placed chicks need to find feed and water quickly, ideally within the first few hours. Delayed access to either has been linked to reduced early growth and weaker flock uniformity, so the goal during placement is to make feed and water as easy to find and reach as physically possible.
A few practical points that make a real difference:
Feeder placement and height — feeders should be positioned so chicks encounter them easily while moving around the brooder, and set at a height chicks can comfortably reach without straining or climbing into the feed. As chicks grow, feeder height needs to be raised to keep pace, otherwise feed gets wasted and litter contamination increases.
Number and spread of feeders — rather than a few large feeders in one area, spreading feed access across the brooding zone (including supplementary flat trays or feeder lids in the first couple of days for very young chicks) reduces competition and helps smaller or slower chicks get their share.
Drinker height and cleanliness — drinkers need to be at a height chicks can reach without climbing in, and should be checked multiple times daily for cleanliness. Water fouled with litter or droppings gets abandoned by chicks fast.
Water temperature — very cold water straight from an outdoor tank can discourage chicks from drinking enough in the first days; water closer to room temperature is generally better accepted early on.
Preventing wet litter around drinkers — leaking or overfilled drinkers create damp patches that chicks avoid, encourage bacterial growth, and can chill chicks that walk through them.
Practical Tip: Physically get down at chick height and look at your feeder and drinker placement from that perspective. If it’s awkward for you to picture a three-day-old chick reaching it easily, it probably is.
For the smallest or weakest chicks in a batch, consider placing a few extra shallow feed trays close to the chick guard boundary, so they don’t have to compete against stronger chicks for access to the main feeders in those first critical days.
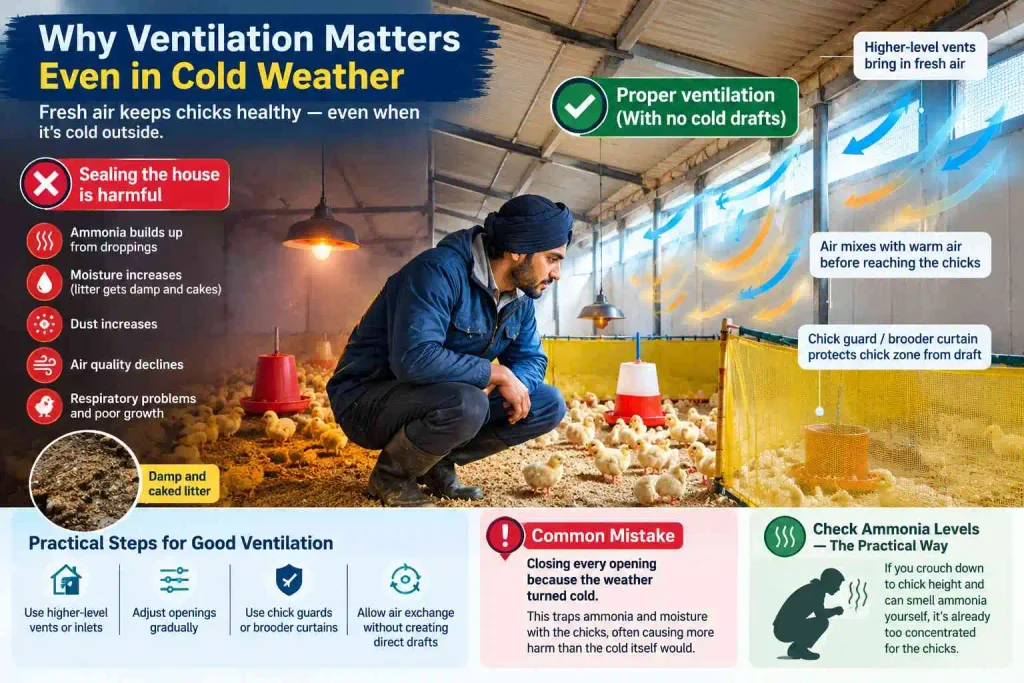
Why Ventilation Matters Even in Cold Weather
There’s a natural instinct in cold weather to seal up the brooder house completely — close every vent, block every gap, keep every bit of warm air inside. It feels logical. It’s also one of the more damaging brooding mistakes a farmer can make.
Chicks need a continuous supply of fresh air, even when it’s cold outside. Without adequate air exchange, ammonia from droppings builds up in the litter and air, moisture accumulates (chicks themselves add humidity through respiration and droppings), litter becomes damp and cakes, dust increases, and overall air quality declines. Poor air quality irritates chicks’ respiratory tracts and can quietly undermine growth and health even when temperature is well managed.
Ventilation does not mean creating a cold draft at chick level. These are two different things, and confusing them is exactly what leads farmers to shut everything down. Proper ventilation brings in fresh air gradually and mixes it with warm air before it reaches the chicks, rather than blasting cold air directly onto them.
Practical approaches include using higher-level vents or inlets so incoming air has room to warm up before descending to chick height, adjusting vent openings gradually rather than fully opening or closing them, and using chick guards or brooder curtains to protect the immediate chick zone from any residual draft while still allowing air exchange in the wider space.
Common Mistake: Closing every opening because the weather turned cold. This traps ammonia and moisture with the chicks, often causing more harm than the cold itself would have.
Check ammonia levels the practical way, too — if you crouch down to chick height and can smell ammonia yourself, it’s already too concentrated for the chicks.
How Much Space Do Chicks Need?
Overcrowding is one of those problems that doesn’t show up as a single dramatic event — it shows up as a slow accumulation of smaller problems. When too many chicks are packed into too little space, competition for feed and water increases, litter quality deteriorates faster because moisture and droppings build up more quickly, heat stress becomes more likely because chicks generate body heat collectively, growth becomes less uniform, and disease pressure tends to rise.
Appropriate stocking density varies with chick age (space needs increase as chicks grow), housing system, climate, breed or strain, and general management practices, so rather than treating any single figure as fixed, use published guidance for your specific breed and system as a starting reference point, then adjust based on how the flock is actually performing — litter condition, chick comfort, and growth uniformity will tell you if density needs to change.
| General Stage | Space Considerations |
|---|---|
| Day-old to ~1 week | Chicks are smallest, but crowding still risks poor litter and uneven access to feed/water |
| 1–3 weeks | Space requirements increase as chicks grow; monitor litter and behavior closely |
| Beyond 3 weeks | Continue increasing available space as birds develop; density limits depend on system and breed |
If you notice litter becoming damp faster than expected, chicks piling in unusual patterns, or feeders and drinkers constantly crowded, stocking density is one of the first things worth reviewing.
Lighting: Why Chicks Need More Than Just Heat
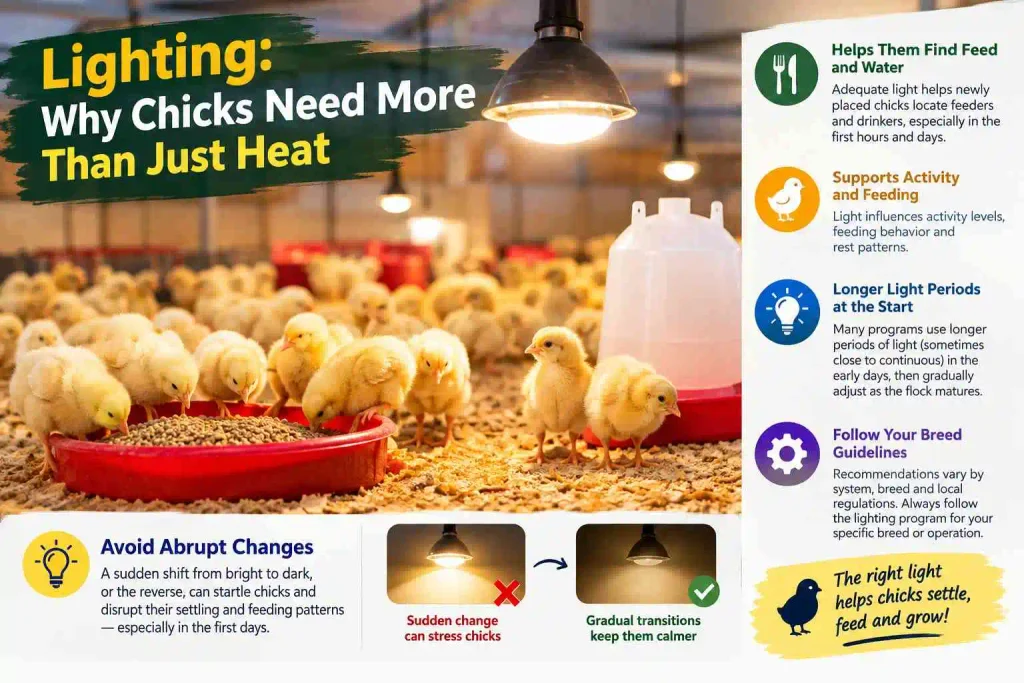
Lighting is easy to underestimate in a brooding discussion dominated by temperature talk, but it plays a real role in how well chicks settle in. Adequate light helps newly placed chicks locate feeders and drinkers, which is especially important in the first hours and days when finding feed and water quickly matters most. It also influences general activity levels, feeding behavior, and rest patterns.
During the earliest days, many brooding programs use longer periods of light (sometimes closer to continuous, depending on the specific program and equipment) to help chicks find their way to feed and water, gradually adjusting light duration and intensity as the flock matures and specific management or lighting programs call for it. Because recommendations vary by system, breed guidelines, and local regulations, farmers should follow the lighting program associated with their specific breed or operation rather than a generic rule.
What matters practically is avoiding abrupt lighting changes. A sudden shift from bright to dark, or the reverse, can startle chicks and disrupt their settling and feeding patterns — especially in the first days when routines are still being established. Gradual transitions, where possible, tend to keep chicks calmer.
The First 24 Hours: What Should a Farmer Check?
The first day sets the tone for everything that follows, and it deserves more attention than a single walk-through at the end of the day. Chicks arriving from the hatchery have already been through a stressful journey — check on them multiple times through the day rather than relying on one inspection.
First 24 hours checklist:
☐ Brooder temperature at chick level
☐ Chick distribution across the brooding area
☐ Water access — are chicks finding and drinking?
☐ Feed access — are chicks finding and eating?
☐ Litter condition — dry, clean, appropriate depth
☐ Ventilation — fresh air without drafts at chick level
☐ Lighting — adequate and functioning
☐ Any weak, injured, or lethargic chicks
☐ Any mortality — count and note
☐ Signs of chilling (huddling) or overheating (panting, spreading out)
☐ Equipment functioning correctly (heaters, drinkers, feeders)
Checking two or three times during the first day, rather than once, catches problems while they’re still small. A chick that’s been chilled for thirty minutes recovers far more easily than one that’s been chilled for six hours.
What Should You Check During the First Week?
Beyond day one, the checks shift focus somewhat as chicks settle into a routine.
Day 1: Placement itself, temperature at chick level, water and feed access, chick distribution — the fundamentals covered above.
Days 2–3: General activity levels (chicks should be moving around, not just sitting still), feed and water intake trends, litter condition (watch for damp patches developing around drinkers), and whether temperature needs a small adjustment based on chick behavior.
Days 4–7: Early growth and uniformity — are chicks roughly similar in size, or is a noticeable gap forming between the largest and smallest birds? Feather development, which gives clues about how brooding temperature should be adjusted going forward. Equipment adjustments, including raising feeder and drinker heights as chicks grow. Ventilation review, since ammonia and moisture buildup often becomes more noticeable by the end of the first week.
Where numerical benchmarks are available for your specific breed (target body weights at 7 days, for instance), treat them as general reference points from commercial guidance rather than fixed thresholds — your own flock’s conditions, health status, and management will influence how closely actual performance tracks published targets.
Any sudden change — a spike in mortality, a noticeable drop in feed or water disappearance, chicks suddenly clustering differently than before — should prompt an immediate check rather than waiting for the next scheduled inspection.
Common Brooding Mistakes That Cost Farmers Money
Most brooding failures aren’t caused by one dramatic error. They’re caused by small, repeated oversights that compound over the first weeks.
1. Starting the brooder too late. The farmer waits until chicks are already arriving to turn on the heat. Chicks spend their first hours in a cold environment before conditions stabilize. Preheat the brooder well before placement.
2. Relying only on a thermometer. The farmer trusts a single number and ignores chick behavior. Floor temperature, drafts, and humidity can all make the true conditions different from what the thermometer shows. Read chick distribution alongside the thermometer, every time.
3. Keeping chicks too far from feed and water. Wide brooding areas or poorly placed chick guards mean some chicks struggle to find feed and water quickly. Use chick guards to keep the group close to feed, water, and heat during the first days.
4. Allowing drinkers to wet the litter. Leaking or overfilled drinkers create damp, chilled patches that chicks avoid or walk through repeatedly. Check drinkers multiple times daily and adjust height and fill level as needed.
5. Closing ventilation completely in cold weather. The farmer seals the house to conserve heat, trapping ammonia and moisture. Maintain fresh air exchange while protecting chicks from direct drafts.
6. Creating drafts at chick level. Gaps under doors, poorly sealed vents, or open windows send cold air directly across the litter. Seal draft sources rather than simply raising the overall temperature to compensate.
7. Overcrowding the brooding area. Too many chicks in too little space stress litter, air quality, and access to resources. Follow density guidance for your breed and adjust based on observed litter and chick condition.
8. Changing temperature too quickly. A sudden large adjustment shocks chicks that were already adapting to previous conditions. Make gradual changes and observe the response before adjusting further.
9. Ignoring weak chicks. A few slow or small chicks get overlooked in a busy flock check. Weak chicks often signal broader issues and can also struggle disproportionately with feed and water access. Identify and address them early, including supplemental feed access if needed.
10. Failing to monitor chick behavior. The farmer checks temperature and moves on without watching how chicks are actually responding. Behavior is the earliest and most reliable indicator that something needs adjusting.
A Practical Brooding Setup for Beginners
For a farmer setting up a first brooder, it helps to picture the layout concretely rather than working from a list alone.
Choose a location free of drafts, ideally away from doors and windows that get opened frequently. Position the heat source centrally within the brooding area so warmth radiates evenly. Set up a chick guard — a low circular or oval barrier — around the heat source and feed/water area to keep chicks from wandering too far in the first days, while leaving enough room for chicks to move away from heat if they get too warm.
Spread clean, dry litter to an appropriate depth across the floor, checked for dampness or unevenness before chicks arrive. Place feeders in a ring or spread pattern within the chick guard, at a height chicks can comfortably reach, supplemented with flat trays for the very first days if needed. Position drinkers similarly, spaced so no chick has to travel far to reach either feed or water, and set at a height that avoids spillage into the litter.
Mount the thermometer at chick height, not on a wall or ceiling, since that’s the temperature that actually matters. Install lighting so the whole brooding area is reasonably lit, avoiding harsh shadows that might discourage chicks from exploring feed and water locations. Finally, check ventilation paths so fresh air can reach the room without creating a direct draft across the chick guard area.
None of this needs to be elaborate. A well-thought-out small setup, checked carefully, consistently outperforms an expensive setup that isn’t monitored closely.
How to Know Your Brooding Program Is Working
Survival alone isn’t a good enough measure of successful brooding — a flock can survive the first weeks while still underperforming badly. Look instead for a broader set of signs: active, alert chicks moving comfortably between heat, feed, and water; good, consistent feed and water intake; even distribution across the brooding area rather than clumping in one zone; dry, well-maintained litter; steady, appropriate growth; good uniformity across the flock rather than a wide spread between the largest and smallest birds; low mortality beyond what’s normally expected; and healthy feather development appropriate for age.
Key Takeaway: The goal isn’t to make the brooder hot. The goal is to make the chicks comfortable — and comfortable chicks show it through behavior, growth, and uniformity, not just survival numbers.
Where possible, weigh a sample of chicks periodically rather than judging growth by eye alone. Tracking actual body weights against expected targets for your breed gives an objective measure that appearance can’t always provide, and it flags problems early enough to still correct course.
When Should You Change Your Brooding Management?
Brooding isn’t a set-it-and-forget-it schedule. It should respond to real, changing conditions rather than follow a fixed plan regardless of what’s actually happening in the house.
Adjustments are often needed in response to weather changes — a cold snap that drops overnight temperatures further than expected, or an unusually hot afternoon that pushes chicks toward heat stress even with the “correct” setting still in place. Poor ventilation showing up as ammonia smell or damp litter calls for a review of air exchange, not just a temperature tweak. Changes in chick behavior — increased huddling, unusual restlessness, uneven distribution — are often the earliest and most reliable signal that something in the environment needs attention, even before other symptoms appear.
Good brooding management comes down to a simple discipline: observe, measure, and adjust. Farmers who treat brooding as a static setup tend to miss the small warning signs. Farmers who treat it as something to actively watch and refine day by day tend to catch problems while they’re still easy to fix.
Getting the First Weeks Right
The first few weeks aren’t the time to cut corners. Everything that happens later — growth rate, feed conversion, uniformity, overall flock health — traces back in some part to how well those early days were managed.
A farmer who prepares the brooder properly before chicks arrive, maintains a suitable and gradually adjusting temperature, makes feed and water genuinely easy to access, protects chicks from drafts without sacrificing ventilation, keeps stocking density reasonable, and watches chick behavior closely rather than trusting equipment readings alone — that farmer is giving the flock a real chance to perform the way it’s genetically capable of performing.
If you’re preparing for your first brooding cycle, don’t wait until the chicks arrive to start thinking through these details. Set up the brooder, preheat it, check every piece of equipment, and walk through the space at chick height before a single bird steps inside. The work you put in before placement day is worth more than any correction you’ll make after problems have already started.
This kind of early-stage discipline matters even more if brooding is just the first phase of a larger layer operation — in that case, it helps to plan brooding management alongside the rest of the setup, from housing and equipment to the costs and profit potential of starting a layer poultry farm, so the early investment lines up with what the flock will need to produce down the line.
Newsletter




[…] Whichever breed you pick, buy chicks only from an ICAR-registered or state government-certified hatchery. Cheap, uncertified chicks are the single most common reason new layer poultry farms under-perform in their first year. Once you’ve sourced healthy chicks, the next critical step is getting their brooding conditions right […]