


Broiler Chicken Farming Guide: Costs, Feed, Housing & Profit (2026)
Six weeks. That’s roughly all it takes to turn a day-old chick into a market-ready broiler weighing over two kilograms. No other livestock enterprise turns capital around that fast, and that’s exactly why so many smallholder farmers—and plenty of commercial operators—keep coming back to broilers year after year.
But here’s the part nobody tells beginners: speed cuts both ways. A broiler flock that grows fast can also die fast, lose money fast, and expose every management mistake within days instead of months. The margin between a profitable batch and a disappointing one usually comes down to five or six decisions made in the first two weeks.
This guide walks you through exactly what those decisions are—breed selection, housing, feeding, temperature control, disease prevention, and the numbers that actually determine your profit. By the end, you’ll know not just what to do, but why it matters and what happens when it’s ignored.
What Makes Broiler Chicken Farming So Profitable?
Broilers convert feed into meat faster than almost any other farmed animal. A well-managed bird reaches slaughter weight in 35–42 days on a feed conversion ratio of around 1.6–1.8 kg of feed per kg of body weight gained. Compare that to cattle, which can take over a year, and you start to see why broilers attract so many first-time livestock farmers.
The other advantage is flexibility. You don’t need hundreds of acres. A 20×30 foot house can comfortably raise 300–400 birds per cycle, and with 5–6 cycles possible per year in a well-run operation, that’s a lot of turnover from a small footprint.
That said, profitability isn’t automatic. Feed typically eats up 65–70% of total production costs, so your margin lives or dies on feed efficiency and mortality rate. A flock with 10% mortality instead of 3% can wipe out an entire cycle’s profit.
Quick Summary: Broilers are profitable because of fast turnover and efficient feed conversion—but only if mortality stays low and feed costs are managed tightly. Ignore either, and the “fast profit” story flips into fast losses.
The good news is that most of what separates a profitable cycle from a losing one isn’t luck. It’s a handful of controllable factors, starting with the breed you choose.
Which Broiler Breed Gives the Best Results?
Two farmers can buy identical feed, build identical houses, and still end up with a two-week difference in how fast their flocks reach market weight. The difference almost always traces back to one decision made before the chicks even arrive: breed selection. Some genetic lines grow fast but struggle in heat. Others are hardier but slower to finish, which quietly eats into your feed costs and cycle turnover.
For most beginners, Cobb 500 and Ross 308 are usually the safest choices because they grow quickly, convert feed efficiently, and are widely available from hatcheries worldwide. These two genetic lines dominate commercial broiler production for good reason—they’ve been bred specifically for rapid weight gain and consistent performance.
Here’s how the major commercial breeds stack up against each other:
| Breed | Average Market Weight (6 weeks) | Feed Conversion Ratio | Heat Tolerance | Best For |
|---|---|---|---|---|
| Cobb 500 | 2.2–2.4 kg | 1.6–1.7 | Moderate | Commercial, fast turnover |
| Ross 308 | 2.3–2.5 kg | 1.65–1.75 | Moderate | Large-scale operations |
| Hubbard | 2.0–2.2 kg | 1.8–1.9 | Good | Hot climates |
| Kuroiler (dual-purpose) | 1.5–1.8 kg | 2.2–2.4 | Excellent | Free-range, backyard systems |
Common Mistake: Buying chicks based purely on price. Cheap, unverified hatchery stock often carries weaker genetics and higher disease susceptibility. That $0.20 saved per chick can cost you $2 in extra feed and lost birds by week five.
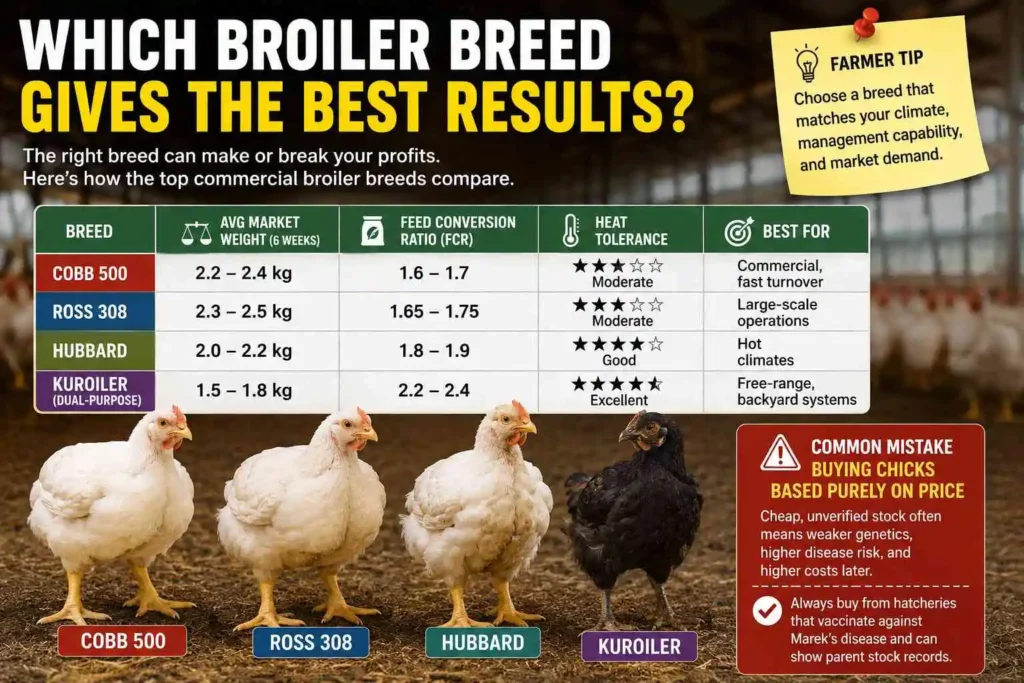
A simple way to improve this is to only source chicks from hatcheries that vaccinate against Marek’s disease before dispatch and can show you parent stock records. It’s a five-minute question that can save your entire batch.
Once you’ve settled on a breed, the next decision—housing—determines whether that genetic potential actually gets expressed.
Why Your Housing Setup Decides Your Success Before the Chicks Even Arrive
There’s a common misconception that housing is just “where the birds stay”—a box to keep them contained until it’s time to sell. In reality, ventilation, space, and litter management are the foundation everything else depends on. Get them wrong, and even the best breed and the best feed won’t save the flock.
Overcrowding is the single biggest housing mistake. Cram too many birds into too little space and you get ammonia buildup, stress, slower growth, and a much faster spread of disease if anything goes wrong. The standard recommendation is 1 square foot per bird for the first three weeks, expanding to 1.5–2 square feet as they grow.
Key housing essentials:
- Ventilation – Fresh air exchange without direct drafts on the birds
- Litter depth – 4–6 inches of wood shavings or rice husks, kept dry
- Lighting – 23 hours of light in week one, gradually reduced afterward
- Drainage – Elevated floor or good runoff to prevent dampness
- Biosecurity barriers – Footbaths and restricted entry points
Did You Know? Damp litter isn’t just uncomfortable for birds—it’s one of the leading causes of coccidiosis outbreaks, because the parasite thrives in moist, warm bedding. Checking litter moisture daily takes thirty seconds and can prevent a disease outbreak that costs you weeks of treatment and lost growth.
This is where many new farmers struggle: they focus so much on feed and medication that housing becomes an afterthought. Get the house right first, and half your disease-prevention work is already done before a single vaccine is administered.
With the house ready, the next question becomes what actually goes into the birds—because feed is where most of your money will be spent.
What’s the Real Secret to Feeding Broilers Without Wasting Money?
If feed is eating up nearly 70% of your production budget, shouldn’t it get more attention than almost anything else on the farm? Most beginners assume feeding is simple—fill the trough, birds eat, birds grow. But get the program wrong and you’re not just wasting money on feed; you’re also slowing growth, which stretches out your cycle and burns even more feed before birds ever reach market weight.
Broilers go through three distinct feeding phases, and matching the right feed to the right age matters more than most people realize:
- Starter feed (Day 1–10): High protein (22–24%) to support rapid early growth and organ development
- Grower feed (Day 11–24): Slightly reduced protein (20–22%), focused on frame and muscle development
- Finisher feed (Day 25–market): Lower protein (18–20%), higher energy to pack on final weight efficiently
The easiest approach for beginners is to buy commercially formulated feed from a reputable supplier rather than attempting to mix your own rations early on. Home mixing can save money long-term, but it requires precise knowledge of nutrient ratios—get it wrong and you’ll see stunted growth or leg problems within days.
Expert Tip: Always provide clean, cool water alongside feed—broilers drink roughly twice as much water (by weight) as they eat feed. A water shortage for even a few hours in hot weather can trigger heat stress and set growth back noticeably.
One mistake many beginners make is switching feed types abruptly. Transition gradually over 2–3 days by mixing old and new feed together, which gives the digestive system time to adjust and prevents the diarrhea and appetite loss that come with sudden changes.
Feed efficiency and housing both feed into the next make-or-break factor: temperature. Get this one wrong, and nothing else you’ve done will matter.
Why Temperature Can Make or Break Your Broiler Farm
More chicks die from getting chilled or overheated in week one than from most diseases combined. That’s the blunt reality of brooding: day-old chicks can’t regulate their own body temperature yet, which makes this the single most unforgiving variable in the entire production cycle.
Here’s the temperature schedule that experienced broiler farmers follow:
| Chick Age | Brooder Temperature | Behavior Sign of Correct Temp |
|---|---|---|
| Day 1–3 | 32–35°C | Chicks spread evenly, chirping softly |
| Day 4–7 | 29–32°C | Active movement, feeding normally |
| Week 2 | 26–29°C | Even spacing, no huddling |
| Week 3 | 23–26°C | Comfortable, feathers settling |
| Week 4+ | 20–23°C | Normal room temperature acceptable |
Chick behavior tells you more than any thermometer. If chicks huddle tightly together under the heat source, they’re too cold. If they spread to the edges of the brooder panting, they’re too hot. Even spacing across the brooder floor means you’ve got it right.
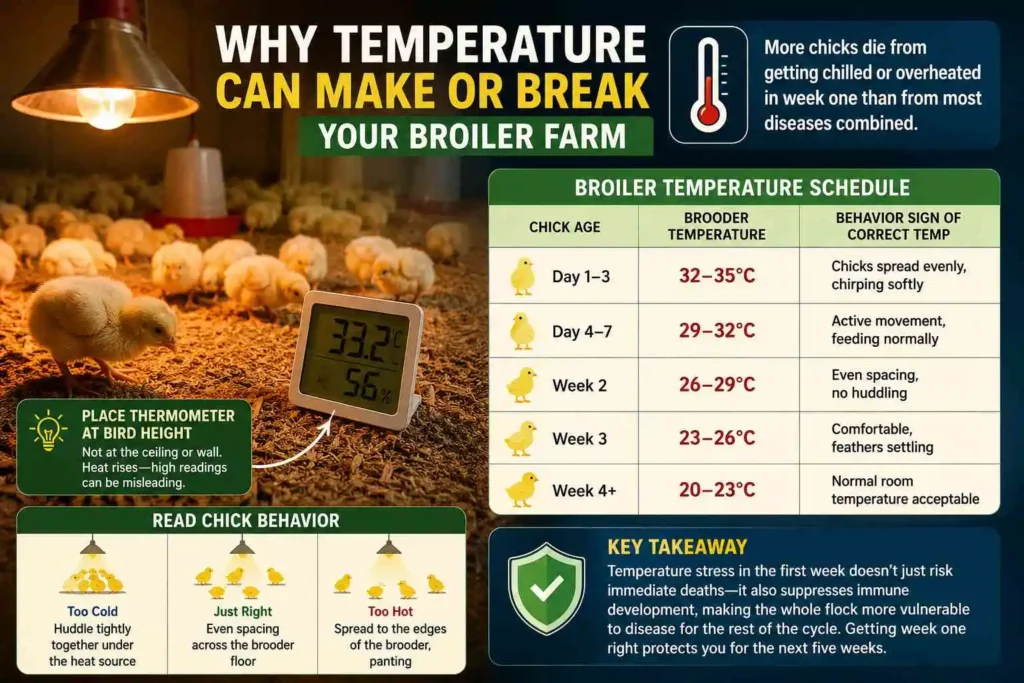
Key Takeaway: Temperature stress in the first week doesn’t just risk immediate deaths—it also suppresses immune development, making the whole flock more vulnerable to disease for the rest of the cycle. Getting week one right protects you for the next five weeks.
A simple way to improve this is installing a basic digital thermometer at bird height, not at the ceiling or wall, since heat rises and readings up high can be misleadingly low—giving you false confidence that chicks are warm enough when they’re not.
Temperature management naturally overlaps with disease prevention, which brings us to the part of broiler farming that scares off the most beginners.
What’s the Biggest Threat to Your Flock, and How Do You Actually Prevent It?
Here’s an unpopular opinion: most disease outbreaks aren’t bad luck—they’re the predictable result of skipped biosecurity steps. A single outbreak of Newcastle disease or infectious bronchitis can wipe out 30–50% of a flock within days, which sounds terrifying until you realize almost all of it traces back to gaps that were entirely preventable. If you want a complete breakdown of common broiler diseases, early symptoms, vaccination schedules, treatment options, and prevention strategies, read our comprehensive guide on Broiler Chicken Diseases: Prevention, Symptoms & Treatment.
Core biosecurity practices that actually work:
- Restrict visitors and require footbaths at the house entrance
- Vaccinate on schedule (Newcastle disease, Gumboro, and Marek’s are the priority three)
- Quarantine new birds for at least two weeks before introducing them to existing stock
- Remove dead birds immediately and dispose of them properly, never leaving carcasses in or near the house
- Clean and disinfect equipment between batches, not just at year-end
Warning: Never assume “closed” housing means safe housing. Wild birds, rodents, and even contaminated feed bags can introduce pathogens. Biosecurity is a system, not a single barrier.
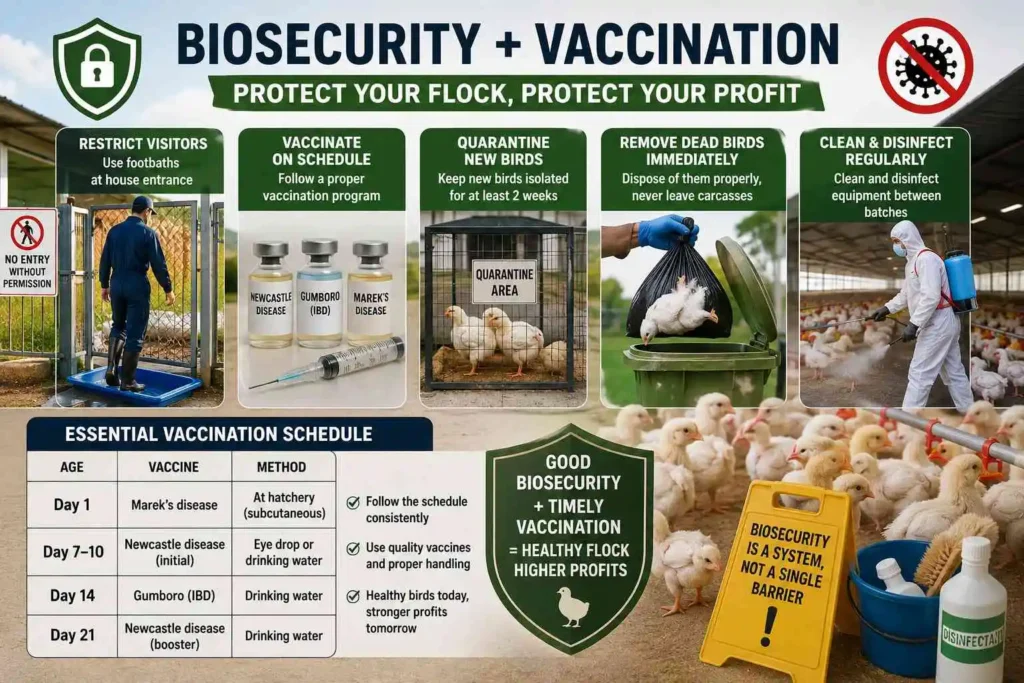
The vaccination schedule below covers the essentials most commercial broiler operations follow:
| Age | Vaccine | Method |
|---|---|---|
| Day 1 | Marek’s disease | At hatchery (subcutaneous) |
| Day 7–10 | Newcastle disease (initial) | Eye drop or drinking water |
| Day 14 | Gumboro (IBD) | Drinking water |
| Day 21 | Newcastle disease (booster) | Drinking water |
This is where many new farmers struggle: they treat vaccination as optional if birds “look healthy.” But subclinical infections often show no symptoms until mortality spikes suddenly—by then, it’s too late to prevent losses, only to limit them.
Getting biosecurity and vaccination right doesn’t just protect this cycle. It protects your reputation with buyers, which matters more than most new farmers expect when it comes time to sell.
How Do You Turn a Healthy Flock Into Real Profit?
Two farmers can raise identical flocks—same breed, same weight, same health record—and still walk away with very different profits. The difference usually isn’t in the barn; it’s in the final week, when selling decisions get rushed and money quietly slips away. Growing healthy birds is only half the job. Selling them at the right time, weight, and price is what actually puts cash in your pocket.
Track these numbers every cycle, because they tell you exactly where your money went:
Quick Summary of Key Metrics to Track:
- Feed Conversion Ratio (FCR): Total feed consumed ÷ total weight gained
- Mortality rate: Should stay under 5% for a well-managed flock
- Average market weight: Compare against breed standard for your bird’s age
- Cost per kilogram produced: Total input costs ÷ total kilograms sold
If your FCR is creeping above 2.0, something in your feeding or health program needs attention—that’s feed money not converting to meat. If mortality creeps above 5%, go back to your temperature logs and biosecurity checklist before assuming it’s “just bad luck.”
The easiest approach to building a reliable market is lining up buyers before your birds reach weight, not after. Broiler prices can swing based on local supply, and farmers who sell in a rush to whoever’s buying that week often accept lower prices than those with standing arrangements.
Your Next Batch Doesn’t Have to Be a Gamble
Broiler farming rewards attention to detail more than almost any other livestock enterprise, and that’s actually good news for beginners. You don’t need years of experience or massive capital to get it right—you need a solid breed choice, a properly prepared house, disciplined feeding, tight temperature control in week one, and a biosecurity routine you actually follow instead of skip when things get busy.
Start your next cycle by picking one area from this guide where you know you’ve been cutting corners—maybe it’s litter checks, maybe it’s the vaccination schedule—and fix that first. Small, consistent improvements compound faster in a six-week cycle than in almost any other farming enterprise you could choose. That’s the real advantage of broilers: mistakes show up fast, but so do the results of doing things right.
Frequently Asked Questions About Broiler Chicken Farming
How many broiler chickens should a beginner start with?
Most consultants recommend starting with 100–300 birds for your first cycle. It’s enough to learn real management lessons and generate meaningful income, but small enough that a mistake won’t be financially devastating. Once you’ve run two or three successful cycles, scaling up to 500+ birds becomes a much safer bet.
How much space do broiler chickens actually need?
Plan on 1 square foot per bird for the first three weeks, expanding to 1.5–2 square feet as they grow toward market weight. Overcrowding is one of the fastest ways to trigger stress, ammonia buildup, and disease outbreaks, so it’s worth erring on the side of more space rather than less.
How long does it take to raise broilers to market weight?
Under good management, broilers reach market weight of 2–2.5 kg in 35–42 days. Anything significantly longer usually points to a problem with feed quality, temperature control, or an underlying health issue that’s slowing growth.
What’s the minimum mortality rate I should expect?
A well-managed flock should stay under 5% mortality for the entire cycle. If you’re consistently seeing losses above that, the issue is almost always traceable to brooding temperature in week one, biosecurity gaps, or a missed vaccination.
Newsletter