



How to Build a Rooftop Kitchen Garden That Survives an Indian Summer
Most rooftop gardens don’t fail in the first month. They fail in May.
The seedlings look great in March. Then the heat arrives, the grow bags dry out by noon, the leaves scorch, and a garden that cost weeks of effort is gone in ten days. The people who get through that first summer are rarely the ones with the most expensive setup. They’re the ones who checked a few things before they started.
This guide walks you through those things. You’ll learn how to tell whether your roof can safely take the weight, which vegetables are worth growing first, and what containers and growing media actually work. You’ll also learn how to handle watering and drainage, protect plants from heat, spot pests before reaching for a spray, and start without overspending.

Can Your Rooftop Actually Handle a Kitchen Garden?
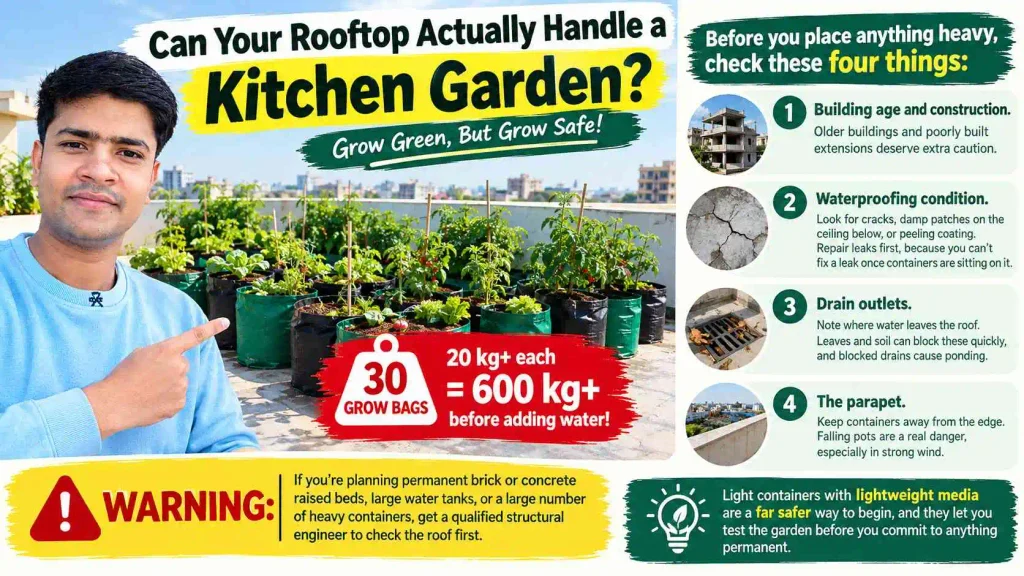
Picture thirty grow bags filled with moist growing media, each holding 20 kg or more. That’s over 600 kg on your roof before you’ve added a single bucket of water. Now put them all in one corner because that’s where the sun is.
This is the mistake that worries structural engineers most. Roofs are designed for a certain load, and many residential terraces in India are designed for a live load in the region of 1.5 kN per square metre (roughly 150 kg per square metre), though this varies with the building’s age, design and construction quality. A wet soil bed can exceed that on its own.
Before you place anything heavy, check these four things:
- Building age and construction. Older buildings and poorly built extensions deserve extra caution.
- Waterproofing condition. Look for cracks, damp patches on the ceiling below, or peeling coating. Repair leaks first, because you can’t fix a leak once containers are sitting on top of it.
- Drain outlets. Note where water leaves the roof. Leaves and soil can block these quickly, and blocked drains cause ponding.
- The parapet. Keep containers away from the edge. Falling pots are a real danger, especially in strong wind.
Warning: If you’re planning permanent brick or concrete raised beds, large water tanks, or a large number of heavy containers, get a qualified structural engineer to check the roof first. Light containers with lightweight media are a far safer way to begin, and they let you test the garden before you commit to anything permanent.
Spread the weight out. Place containers along load-bearing walls and beams where possible, rather than clustering everything at the centre of a slab. And if your building is a shared apartment terrace, check with your housing society before you begin.
Spend One Day Watching Your Terrace Before You Buy Anything
The easiest way to waste money on a rooftop garden is to buy plants before you know where the sun falls. So take one clear day and check the terrace at 9 a.m., noon and 4 p.m.
Note which patches get direct sun and which get shade from water tanks, parapets or neighbouring buildings. You’re looking for at least 5 to 6 hours of direct sunlight for fruiting crops like tomato, brinjal, chilli and okra. Leafy vegetables and herbs cope with less, and they’ll often do better with some afternoon shade.
Also notice where the wind hits hardest and where the floor gets uncomfortably hot to touch. Those spots matter as much as the sun map.
Practical Tip: Sketch a quick plan on paper. Mark the sunny zone, the partly shaded zone, and the windy edge. Then assign crops to zones instead of scattering containers wherever there’s space.
Which Vegetables Give the Most Harvest From a Small Rooftop?
Not every vegetable earns its place on a terrace. Some need deep root space, others need six hours of sun and a trellis, and some simply take too long to justify the container they occupy.
Here’s how to think about it. Leafy crops like spinach, coriander and fenugreek are quick, forgiving and fine in shallow containers. Fruiting crops like tomato, brinjal and chilli give more per plant but need deeper containers, more sun and steady feeding. Climbers like cucumber, beans and gourds can produce a lot, but they need a strong support and space above the container.
Not everything works everywhere. Tomatoes, for example, tend to drop flowers and struggle to set fruit when days stay very hot, which is why they’re usually a winter crop in north India. The comparison below is a practical starting point rather than a rulebook, because timings vary by region and variety.
| Crop | Minimum container depth | Best season (north India) | Approx. time to first harvest | Difficulty |
|---|---|---|---|---|
| Coriander | 6–8 in | Winter | 30–45 days | Easy |
| Spinach (palak) | 6–8 in | Winter | 30–40 days | Easy |
| Fenugreek (methi) | 6–8 in | Winter | 25–35 days | Easy |
| Radish | 8–10 in | Winter | 30–45 days | Easy |
| Chilli | 12 in | Most of the year, except peak winter | 2.5–3 months | Moderate |
| Okra (bhindi) | 12–15 in | Summer and monsoon | 50–60 days | Moderate |
| Tomato | 15–18 in | Winter | 60–80 days after transplant | Demanding |
| Brinjal | 15–18 in | Summer and monsoon | 60–80 days after transplant | Moderate |
| Cucumber / gourds | 15–18 in + trellis | Summer and monsoon | 45–90 days | Moderate |
| Pole beans | 12–15 in + support | Monsoon and cooler months | 50–70 days | Moderate |
For most beginners, the sensible first list is coriander, spinach, fenugreek, a couple of chilli plants and some herbs. They grow fast, you learn from them quickly, and a failed crop costs very little. Add okra or brinjal once you’ve seen how your terrace behaves in summer, and leave tomatoes and climbers for your second season.
Key Takeaway: Choose crops by season and container depth, not by what you enjoy eating most. A garden full of the right-season crops beats a garden full of favourites that sulk.
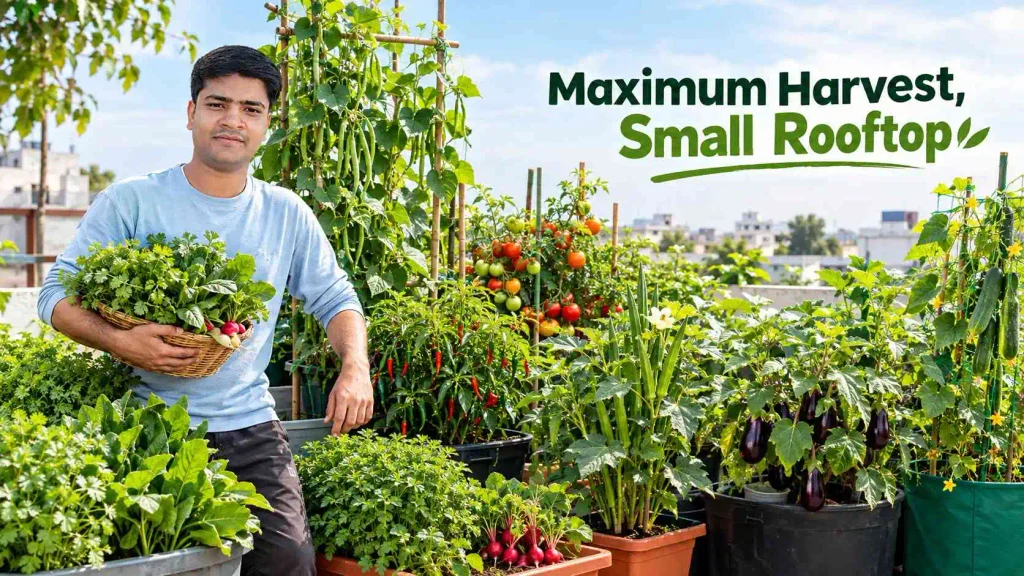
Grow Bags, Pots or Raised Beds: What Works Best on a Rooftop?
You’ll see rooftop gardens in everything from paint buckets to brick beds. Some choices are smart, others create problems you won’t notice until the first monsoon.
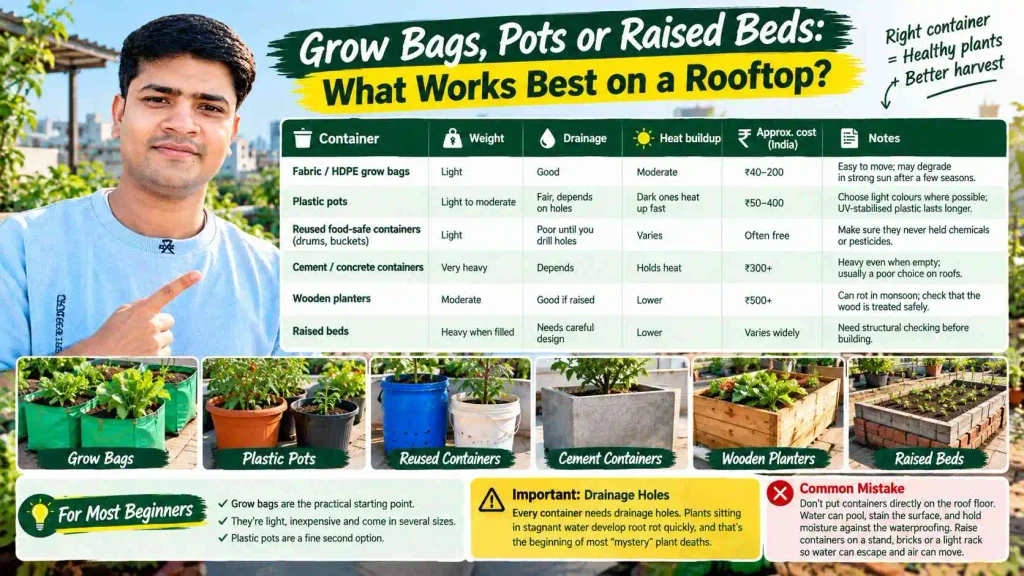
The comparison below covers the containers most people actually consider. Weight, drainage and heat buildup are the three things that bite rooftop gardeners hardest, so those are what to look at.
| Container | Weight | Drainage | Heat buildup | Approx. cost (India) | Notes |
|---|---|---|---|---|---|
| Fabric / HDPE grow bags | Light | Good | Moderate | ₹40–200 depending on size | Easy to move; may degrade in strong sun after a few seasons |
| Plastic pots | Light to moderate | Fair, depends on holes | Dark ones heat up fast | ₹50–400 | Choose light colours where possible; UV-stabilised plastic lasts longer |
| Reused food-safe containers (drums, buckets) | Light | Poor until you drill holes | Varies | Often free | Make sure they never held chemicals or pesticides |
| Cement / concrete containers | Very heavy | Depends | Holds heat | ₹300+ | Heavy even when empty; usually a poor choice on roofs |
| Wooden planters | Moderate | Good if raised | Lower | ₹500+ | Can rot in monsoon; check that the wood is treated safely |
| Raised beds | Heavy when filled | Needs careful design | Lower | Varies widely | Need structural checking before building |
For most beginners, grow bags are the practical starting point. They’re light, inexpensive, come in several sizes, and can be shifted when you realise a spot is too hot or too shaded. Plastic pots are a fine second option.
Whatever you use, every container needs drainage holes. Plants sitting in stagnant water develop root rot quickly, and that’s the beginning of most “mystery” plant deaths.
Common Mistake: Putting containers directly on the roof floor. Water can pool underneath, stain the surface, and hold moisture against the waterproofing. Raise containers on a stand, bricks or a light rack so water can escape and air can move.
Why Garden Soil Alone Is a Poor Choice on a Rooftop
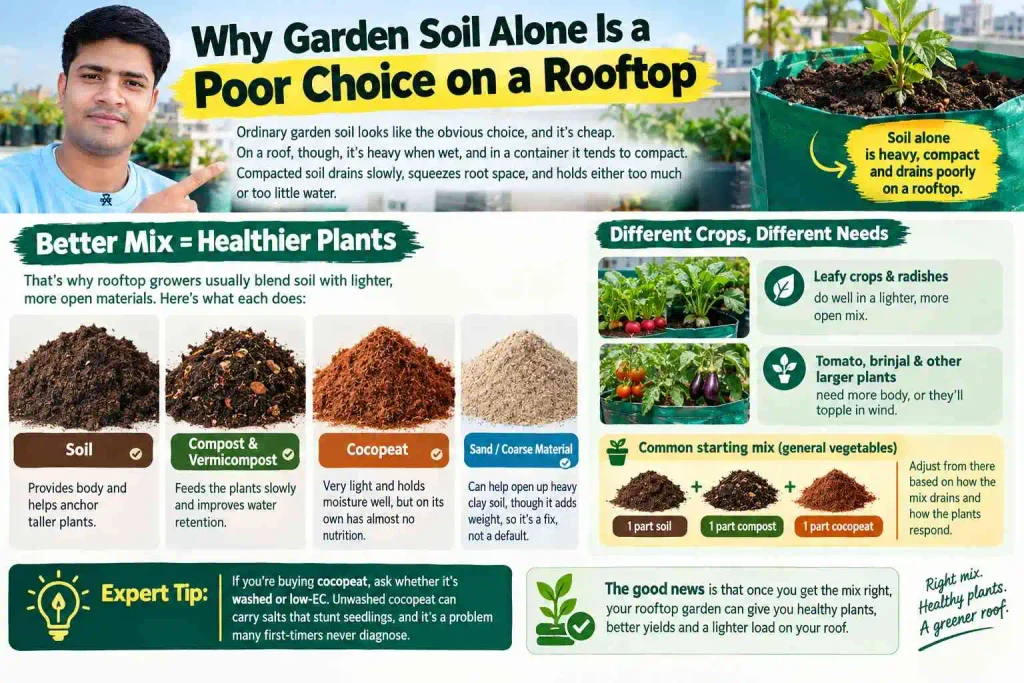
Ordinary garden soil looks like the obvious choice, and it’s cheap. On a roof, though, it’s heavy when wet, and in a container it tends to compact. Compacted soil drains slowly, squeezes root space, and holds either too much or too little water.
That’s why rooftop growers usually blend soil with lighter, more open materials. Here’s what each does:
- Soil provides body and helps anchor taller plants.
- Compost and vermicompost feed the plants slowly and improve water retention.
- Cocopeat is very light and holds moisture well, but on its own it has almost no nutrition.
- Sand or other coarse material can help open up heavy clay soil, though it adds weight, so it’s a fix, not a default.
There isn’t one perfect ratio. Leafy crops and radishes do well in a lighter, more open mix. Tomato, brinjal and other larger plants need more body, or they’ll topple in wind. A common starting point for general vegetables is roughly equal parts soil, compost and cocopeat, adjusted from there based on how the mix drains and how the plants respond.
Expert Tip: If you’re buying cocopeat, ask whether it’s washed or low-EC. Unwashed cocopeat can carry salts that stunt seedlings, and it’s a problem many first-timers never diagnose.
The good news is that once you have a mix that works, you can reuse it. Refresh it with compost between crops rather than replacing everything.
Feeding the Garden Without Overdoing It
Containers hold a limited amount of nutrition, and frequent watering washes some of it out. So plants in pots need feeding, but they don’t need fertiliser piled on.
A simple rhythm works for most vegetable containers. Mix vermicompost or well-rotted compost into the media at the start, then top-dress with a thin layer every three to four weeks. Leafy crops respond to nitrogen-rich feeding, while fruiting crops like tomato, brinjal and chilli need steadier feeding once they start flowering.
Too much nitrogen gives you lush green leaves and very little fruit. It also makes plants more attractive to sap-sucking pests. And no single fertiliser suits every crop, so if a product’s label says otherwise, be sceptical.
Never use fresh manure on containers. It can burn roots and cause smells and fungus gnats.
Why Rooftop Plants Dry Out So Quickly (and How to Fix It)
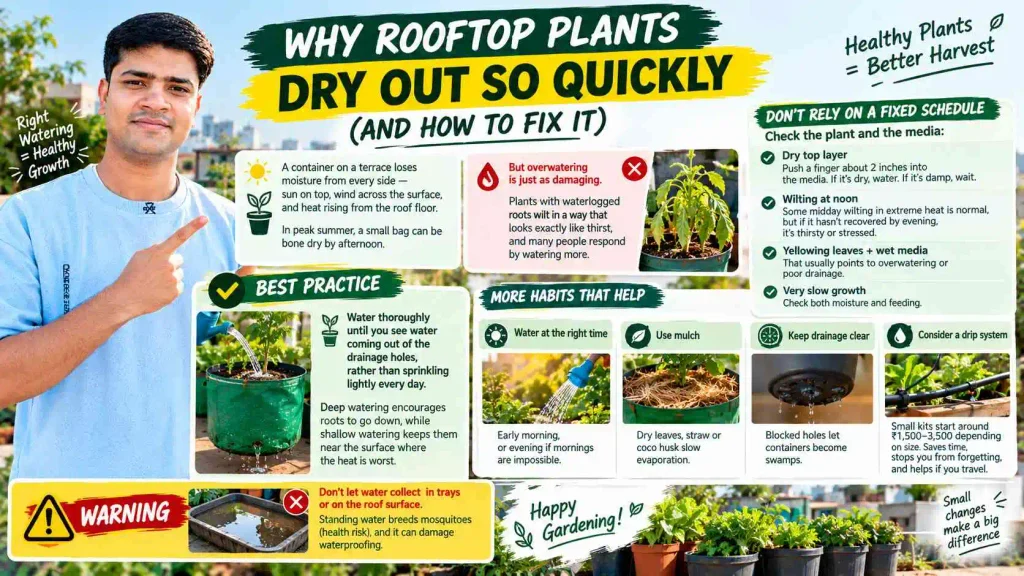
Water is where most rooftop gardens win or lose. A container on a terrace loses moisture from every side, with sun on top, wind across the surface, and heat rising from the roof floor. In peak summer, a small bag can be bone dry by afternoon.
But overwatering is just as damaging. Plants with waterlogged roots wilt in a way that looks exactly like thirst, and many people respond by watering more.
So don’t rely on a fixed schedule. Check the plant and the media:
- Dry top layer. Push a finger about 2 inches into the media. If it’s dry, water. If it’s damp, wait.
- Wilting at noon. Some midday wilting in extreme heat is normal, but if the plant hasn’t recovered by evening, it’s thirsty or stressed.
- Yellowing leaves with wet media. That usually points to overwatering or poor drainage.
- Very slow growth. Check both moisture and feeding.
Best Practice: Water thoroughly until you see water coming out of the drainage holes, rather than sprinkling lightly every day. Deep watering encourages roots to go down, while shallow watering keeps them near the surface where the heat is worst.
A few more habits help. Water in the early morning, or in the evening if mornings are impossible. Mulch the surface with dry leaves, straw or coco husk to slow evaporation. And keep drainage holes clear, because blocked holes let containers become swamps.
If you’re running more than ten or so containers, a basic drip system with a timer is worth considering. Small kits typically start around ₹1,500–3,500 depending on size, and they save time and stop you from forgetting on busy days. They also help if you travel.
Warning: Don’t let water collect in trays or on the roof surface. Standing water breeds mosquitoes, which is a health risk, and it can damage waterproofing.
How to Keep Your Rooftop Garden Alive Through Extreme Summer Heat
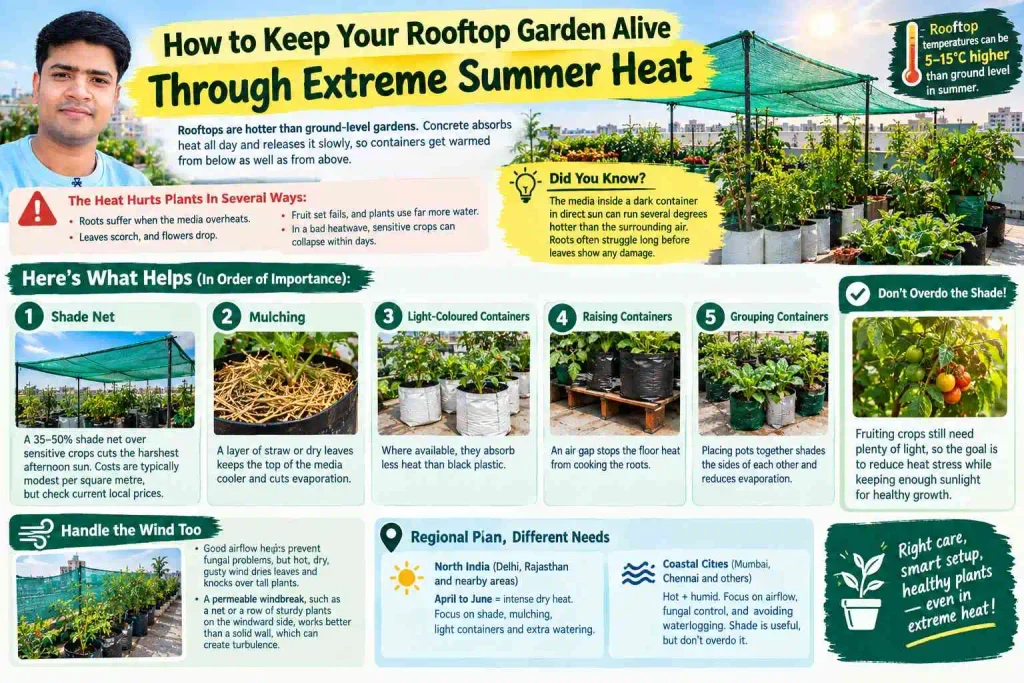
Rooftops are hotter than ground-level gardens. Concrete absorbs heat all day and releases it slowly, so containers get warmed from below as well as from above.
That heat hits plants in several ways. Roots suffer when the media overheats. Leaves scorch, and flowers drop. Fruit set fails, and plants use far more water. In a bad heatwave, sensitive crops can collapse within days.
Did You Know?: The media inside a dark container in direct sun can run several degrees hotter than the surrounding air. Roots often struggle long before leaves show any damage.
Here’s what helps, roughly in order of importance:
- Shade net. A 35–50% shade net over sensitive crops cuts the harshest afternoon sun. Costs are typically modest per square metre, but check current local prices.
- Mulching. A layer of straw or dry leaves keeps the top of the media cooler and cuts evaporation.
- Light-coloured containers. Where available, they absorb less heat than black plastic.
- Raising containers off the floor. An air gap stops the floor heat from cooking the roots.
- Grouping containers. Placing pots together shades the sides of each other and reduces evaporation.
But don’t overdo the shade. Fruiting crops still need plenty of light, so the goal is to reduce heat stress while keeping enough sunlight for healthy growth.
Wind needs handling too. Good airflow helps prevent fungal problems, but hot, dry, gusty wind dries leaves and knocks over tall plants. A permeable windbreak, such as a net or a row of sturdy plants on the windward side, works better than a solid wall, which can create turbulence.
Regional conditions change the plan. In Delhi, Rajasthan and much of north India, the fight is against intense dry heat from April to June. In coastal cities like Mumbai or Chennai, the summer heat is less extreme but humidity is high, so fungal problems are more likely, and drainage during the monsoon becomes the bigger concern. Adjust to your own city rather than copying advice written for another climate.
Before You Spray Anything, Find Out What’s Actually Damaging the Plant
A yellowing leaf isn’t always a pest. Sometimes it’s heat, sometimes overwatering, sometimes a nutrient shortage. Spraying the wrong thing wastes money and can make the plant worse.
The table below helps you narrow down the cause before you act.
| What you see | Possible cause | What to check | What to do |
|---|---|---|---|
| Curled, sticky leaves with tiny insects | Aphids or whitefly | Look under the leaves | Wash off with water, remove badly affected leaves, use a neem-based product if needed |
| Fine webbing, speckled leaves in dry heat | Spider mites | Undersides of leaves | Increase humidity around plants, wash leaves, treat if it continues |
| White powdery coating | Fungal (powdery mildew) | Airflow and crowding | Remove affected leaves, thin plants, improve spacing |
| Yellow lower leaves, damp media | Overwatering | Drainage holes and media moisture | Reduce watering, improve drainage |
| Crispy brown edges, wilting at noon | Heat stress or underwatering | Media dryness, sun exposure | Add shade, mulch, adjust watering |
| Pale, slow growth | Nutrient shortage | Last feeding, media age | Top-dress with compost, feed appropriately |
| Holes in fruit or shoots | Borers or caterpillars | Inspect fruit and stems | Hand-pick, remove damaged parts |
Start with the gentlest approach. Inspect plants a few times a week, since problems caught early are easier to manage. Remove heavily damaged leaves, physically remove pests where you can, and keep enough space between plants for air to move.
If you need to spray, use commercial neem-based products or mild soap-based sprays as directed on the label, and test on a few leaves first. Spray in the evening rather than in hot sun. Don’t mix chemicals or try home-made recipes you can’t verify, and don’t assume any organic method guarantees a pest-free garden, because it doesn’t.
Expert Tip: Brinjal and chilli attract pests more than most crops. If you’re growing both, inspect them weekly and act at the first sign, since a small infestation is far easier to handle than a large one.
Where to Spend Money and Where to Save
A rooftop garden doesn’t need to become an expensive hobby. But it does reward spending in the right places.
Spend carefully on:
- Good-quality growing media, since poor media causes problems that no fertiliser can fix
- Reliable containers with proper drainage
- Healthy seedlings or good-quality seeds
- Shade netting when your terrace actually needs it
- Drip irrigation once you have more than a handful of containers
Save on:
- Decorative pots, because plants don’t care what the container looks like
- Excess fertilisers and gadgets
- Large permanent structures before you’ve tested the space
As a rough guide, a starter setup of 15–20 grow bags with media, seeds and a bit of shade net might cost somewhere between ₹6,000 and ₹12,000, before drip irrigation. Treat that as approximate, since prices vary widely by city and supplier.
Will it save you money? Not always. Leafy greens, herbs and chillies can offset what you’d otherwise buy, but the real value is freshness, convenience and the ability to grow the herbs and vegetables your family uses most. If the goal is purely to cut the vegetable bill, be realistic about it.
Picking at the Right Time Changes How Much You Get
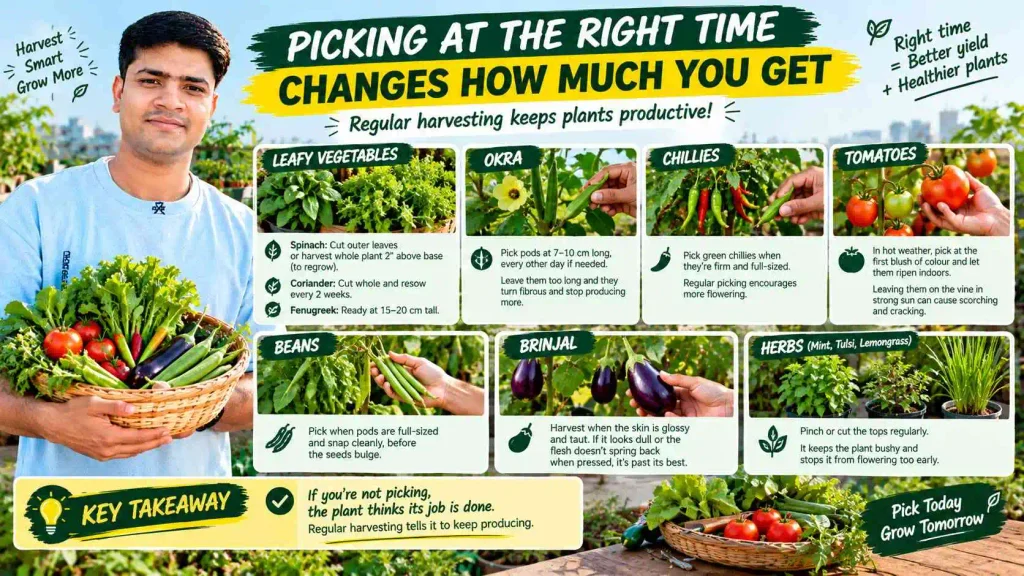
Harvesting isn’t just the finish line. For many crops, regular picking is what keeps the plant producing.
Leafy vegetables: Cut outer leaves of spinach when they’re a usable size, or cut the whole plant a couple of inches above the base to let it regrow. Coriander is best cut whole and resown every couple of weeks. Fenugreek is ready when plants are around 15–20 cm tall.
Okra: Pick pods at around 7–10 cm long, every other day if needed. Leave them too long and they turn fibrous and stop the plant from producing more.
Chillies: Pick green chillies when they’re firm and full-sized. Regular picking encourages more flowering.
Tomatoes: In hot weather, pick at the first blush of colour and let them finish ripening indoors. Leaving them on the vine in strong sun risks scorching and cracking.
Beans: Pick when pods are full-sized and snap cleanly, before the seeds bulge.
Brinjal: Harvest when the skin is glossy and taut. If it looks dull or the flesh doesn’t spring back when pressed, it’s past its best.
Herbs like mint, tulsi and lemongrass: Pinch or cut the tops regularly. It keeps the plant bushy and stops it from flowering too early.
Key Takeaway: If you’re not picking, the plant thinks its job is done. Regular harvesting tells it to keep producing.
Start Small, Watch Closely, Then Expand
If there’s one thing to take from all this, it’s that a good rooftop garden grows out of observation, not ambition. You don’t need thirty containers. You need six, placed well, with the right crops for the season.
Start with a handful of reliable crops, such as coriander, spinach, a chilli plant or two, and a few herbs. Learn how quickly your containers dry out in the afternoon. Notice which corner gets the harshest sun and how your terrace behaves when the wind picks up.
Then use the first season as your teaching ground. Some crops will do well and some will struggle, and that tells you more about your terrace than any guide can. Once you understand your sunlight, heat and water patterns, expand gradually.
This week, do two things. Check your roof’s condition and drainage, and take a sunlight map on a clear day. Once you know those two things, you’ll be able to start with confidence rather than guesswork.
Newsletter